Blog

  • How to Layer Clothes for Cold Weather Without Adding Bulk

    How to Layer Clothes for Cold Weather Without Adding Bulk

    Thirty seconds. That’s roughly how long it takes to go from a freezing sidewalk to a subway car blasting heat at 24°C. And that thermal whiplash, repeated four or five times a day, is the thing that turns winter dressing into a daily frustration for city commuters.

    Most winter layering advice treats cold weather like a single problem: stay warm. But city cold is a different animal. It comes in bursts between overheated offices, steamy cafés, and packed metro cars where everyone is slowly melting inside their parkas.

    This guide is for the person who walks to work, grabs transit, ducks into meetings, and does it all without wanting to carry a duffel bag of shed clothing. If that sounds like a Tuesday, keep reading.

    Why Three Thin Layers Beat One Heavy Coat on City Streets

    The physics here are straightforward: trapped air insulates. A single thick coat traps one big pocket of air against the body. Three thin layers create multiple air pockets between them, and each pocket holds heat independently. 

    The total insulation can match or beat a heavy coat while weighing less and packing smaller. But the real advantage for city dwellers is modularity. A heavy coat is either on or off. 

    Three layers give five or six temperature settings just by zipping, unzipping, or removing one piece. Walking fast to catch a bus? Unzip the outer shell. Sitting in an air-conditioned restaurant? Pull off the mid layer.
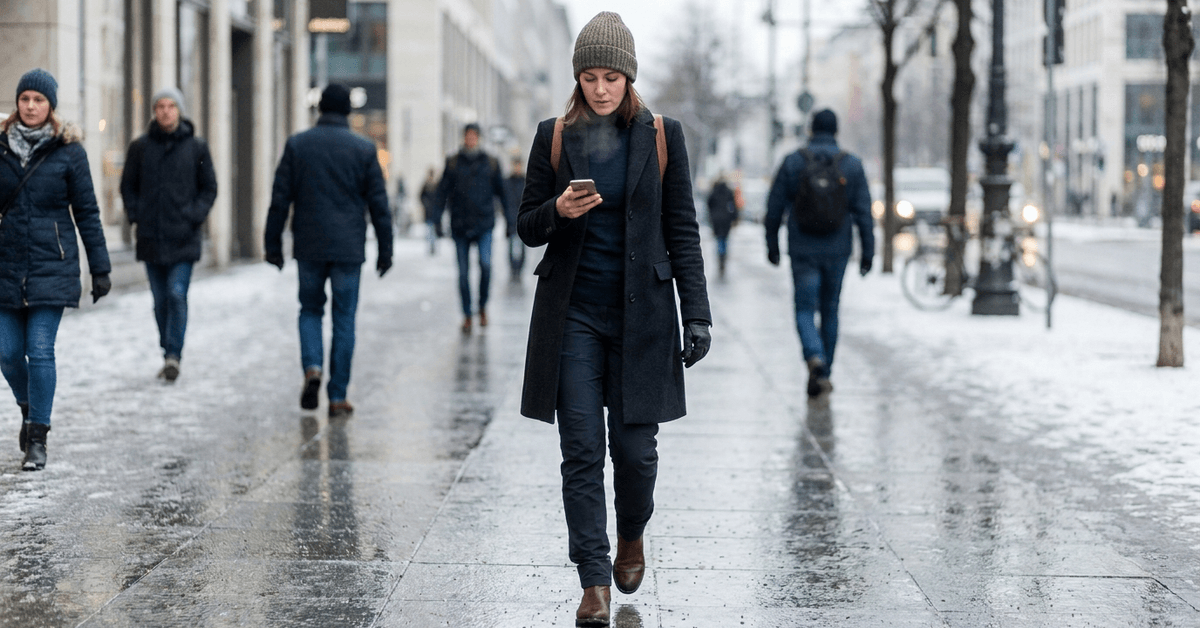
    Image 1

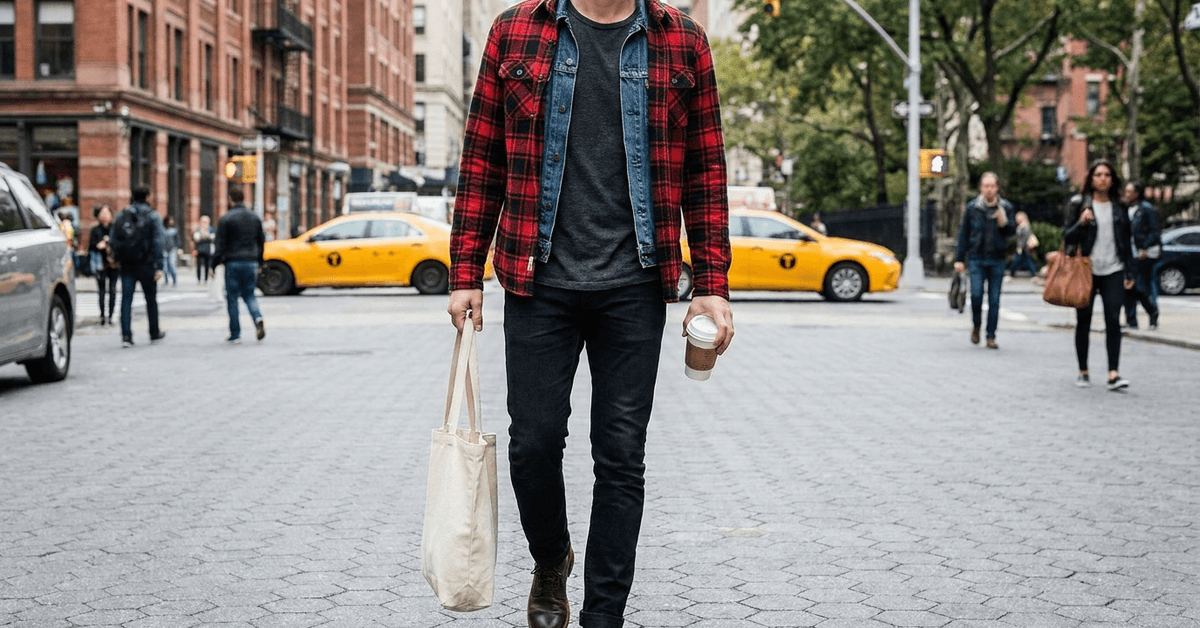
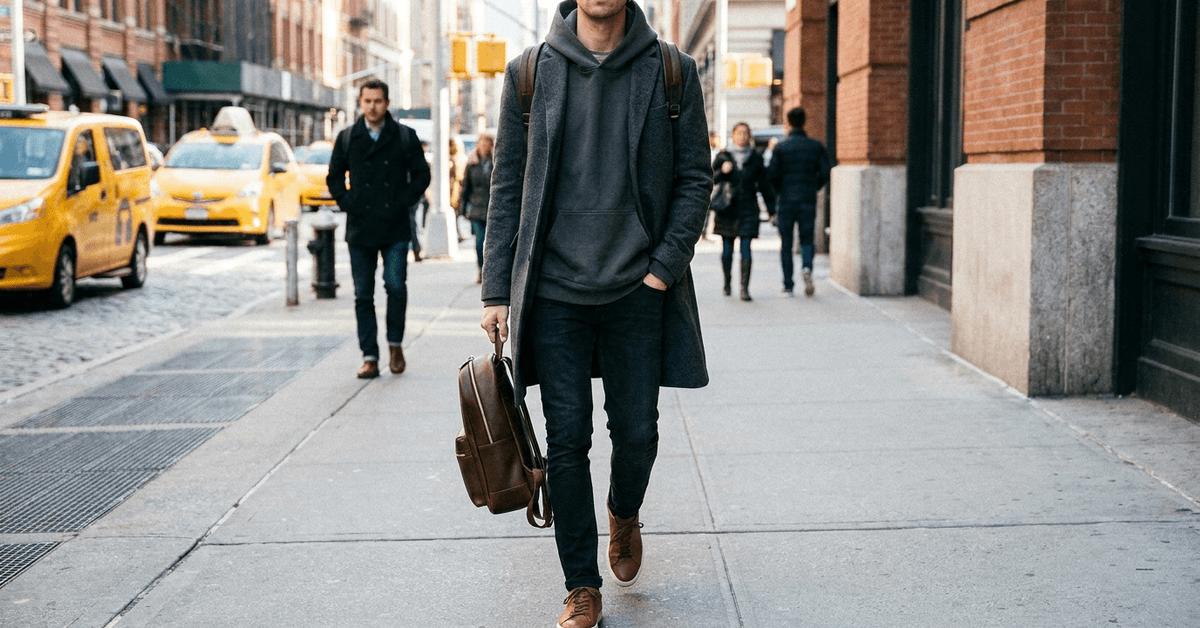
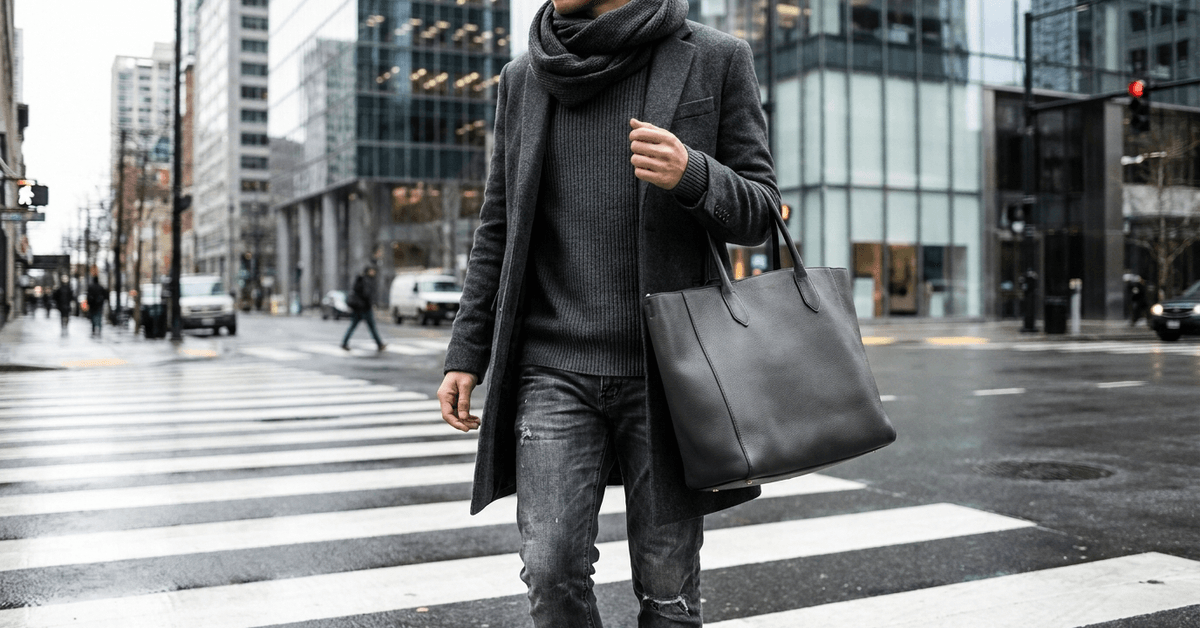
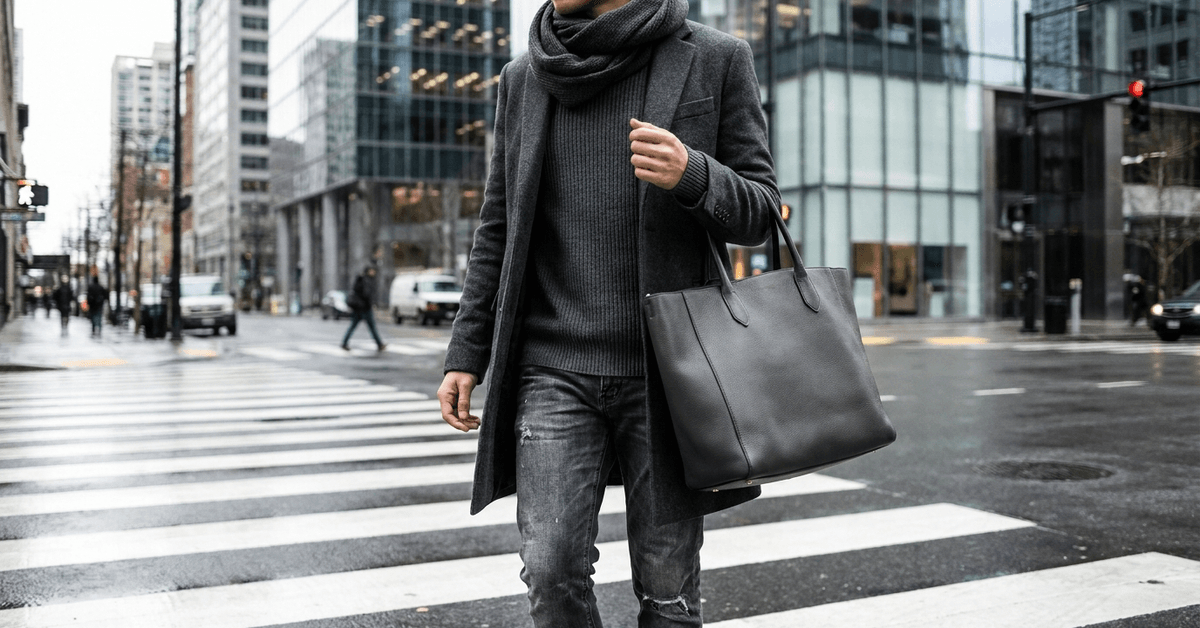
    I would take a Uniqlo HEATTECH long sleeve, a microfleece half-zip, and a water-resistant shell over any $400 parka for a standard commute day in a city like Berlin or Toronto. 

    That combination weighs less, fits in a messenger bag when peeled off, and handles the 20-degree temperature swings between street and subway that a single heavy coat simply cannot adapt to.

    The Fabric Question Commuters Get Backwards

    Picking the right fabrics matters more than picking the right brands. And the advice most people follow on this topic is, I think, genuinely misleading.

    Merino Wool Is Overhyped for Daily Commuting

    I think the widespread recommendation to buy merino wool base layers at $60 to $80 per shirt is bad advice for the average city commuter. Merino is a fantastic fabric. It regulates temperature, resists odor, and feels soft against the skin. 

    But it wears out fast under daily use, pills after a dozen washes, and loses shape if you’re throwing it in a regular machine cycle.

    Synthetic HEATTECH-style layers, priced at $15 to $20 per piece, last longer under daily washing, dry faster after a sweaty commute, and perform nearly as well in the 0°C to 10°C range where most city winters sit. 

    Cotton: The Worst Possible Base Layer for Transit Riders

    Cotton absorbs moisture and holds it against the skin. On a cold day, that means sweat from a brisk walk turns ice-cold the moment you stop moving or step into wind. 

    Cotton base layers are the single fastest way to feel miserable on a winter commute. Swap every cotton undershirt for a synthetic or merino alternative, and the improvement is immediate.

    Building a Three-Layer System for City Winters

    The three-layer system breaks into base, mid, and outer. Each has a specific job, and getting the fit right between them matters as much as the material choice.

    Base Layer: Tight, Thin, and Moisture-Wicking

    The base layer sits directly against the skin. It should fit snug without constricting movement. Its job is pulling sweat away from the body so the mid layer stays dry.

    Strong options to consider:

    • Uniqlo HEATTECH Extra Warm for budget-friendly daily wear in mild to moderate cold
    • Smartwool Classic Thermal Merino for days below -5°C where odor resistance matters
    • Icebreaker 200 Oasis for a mid-weight merino option that balances warmth and breathability

    Mid Layer: The Insulation Engine

    The mid layer traps body heat. It needs to be warm enough to matter but slim enough to fit comfortably under an outer shell without bulking up the arms or shoulders.

    A fitted microfleece zip-up is the workhorse here. Fleece insulates even when damp, dries fast, and costs a fraction of down alternatives. Thin merino pullovers work too, especially for office settings where a fleece might look too casual. 

    A lightweight down vest adds core warmth without restricting arm movement: a strong choice for mild days when a full mid layer feels excessive.

    Outer Layer: Wind and Water Protection

    The outer shell blocks wind and repels rain or wet snow. It does not need to be warm on its own. That’s the mid layer’s job. A slim, water-resistant shell with sealed seams and an adjustable hood handles most city winter conditions.

    Brands like Arc’teryx and Patagonia make shells with PrimaLoft or synthetic fill that add a touch of warmth without bulk. Quilted jackets in this category pack down small enough to stuff in a backpack when you step indoors.

    Feature Merino Wool Synthetic (HEATTECH) Microfleece Down Fill
    Warmth-to-weight ratio High Moderate Moderate Very high
    Dry time Slow Fast Fast Very slow
    Durability under daily washing Low High High Low
    Price per piece $50-$90 $10-$25 $20-$50 $60-$200
    Odor resistance Strong Weak Weak Moderate

    The takeaway: no single fabric wins across every category, so mixing materials across layers gives the best daily performance.

    Accessories That Change Everything Below Freezing

    Layers handle the torso. But exposed hands, ears, and neck lose heat fast, and most commuters underestimate how much warmth a few small accessories add.

    Touchscreen Gloves and Thin Scarves

    Touchscreen-compatible gloves let you check transit apps and respond to messages without bare-handing a phone in -5°C wind. Bulk-free fleece or knit options from brands like Mujjo keep dexterity intact.

    A thin merino or cashmere-blend scarf adds surprising warmth. Tucked inside a shell collar, it seals the gap where cold air typically rushes in around the neck. A bright scarf also works as the one pop of color in an otherwise neutral winter outfit.

    Slim Beanies and Ear Coverage

    Covering the ears drops the perceived cold by a noticeable margin. Slim beanies fit under bike helmets and over headphones, making them practical for commuters who cycle or listen to podcasts on the walk to work. 

    Headbands are a lighter alternative for days above freezing when a full beanie feels like overkill.

    City-Specific Layering Tricks Worth Stealing

    Different cities produce different layering habits. Some of the smartest approaches come from watching how locals dress in places where winter commuting is routine.

    Tokyo is the masterclass in thin layering. Locals stack two or three HEATTECH layers under a slim overcoat and look like they’re wearing a single outfit. The silhouette stays clean because every piece is cut close to the body.

    Berlin commuters, especially cyclists in neighborhoods like Kreuzberg, favor a fitted merino base under a technical windshell. The combination handles wind on a bike and doesn’t overheat in the U-Bahn.

    Toronto residents pair slim base tights and a lightweight down vest under sharp blazers. The look works at outdoor events and transfers straight into a heated office.

    A few transit-specific habits worth borrowing:

    • Pre-warm outerwear indoors for a few minutes before stepping outside, so the shell starts at body temperature
    • Unzip the outer layer two stops before exiting a hot subway to start cooling gradually
    • Carry a packable tote or compression sack in a messenger bag for stashing removed layers during long indoor stretches
    • Wind-proof outer layers over base insulation beat thick coats for anyone biking or using rental scooters

    Keeping Technical Layers Alive Longer

    Spending money on good layers only to ruin them in the wash is a common and preventable mistake.

    Gentle machine cycles and mesh wash bags protect synthetic fabrics and merino from pilling and stretching. Skip the dryer for merino and down pieces. Air drying takes longer but preserves insulation and shape over dozens of washes.

    Between wears, let technical layers air out on a hook or hanger rather than stuffing them directly into a backpack. Moisture trapped in a closed bag breaks down insulating fibers faster. 

    Cladwell is an outfit planning app that helps organize winter wardrobes without overbuying, which is useful for commuters building a layering rotation with limited closet space.

    Questions People Ask About Winter Layering in the City

    A handful of practical questions come up repeatedly around this topic.

    • Q: How do I layer for a bike commute without overheating? Start cold. A wind-proof shell over a moisture-wicking base is usually enough because cycling generates significant body heat within minutes. Adding a mid layer makes sense only below -5°C or on longer rides.
    • Q: Does layering color matter, or is that just a style preference? Neutral tones like black, navy, and grey make mixing and matching simpler across work and casual settings. A single outer shell can pair with everything underneath, which cuts the number of pieces a commuter needs to own.
    • Q: How often should technical base layers be washed? Synthetic layers should be washed after every wear because they hold odor quickly. Merino can go two or three wears between washes if aired out properly, which is one of its few practical advantages over synthetics for travel.

    Conclusion

    Three thin layers adapted to temperature swings will outperform one expensive coat on any city commute. The real test of a good layering system is whether it handles the subway-to-sidewalk shift without thought. 

    Pick fabrics that dry fast, fit close, and shed easily when indoor heat hits. A winter spent peeling layers instead of sweating through a parka is a winter spent moving freely.
  • How to Pull Off the Vintage Graphic Tee Look Effortlessly

    How to Pull Off the Vintage Graphic Tee Look Effortlessly

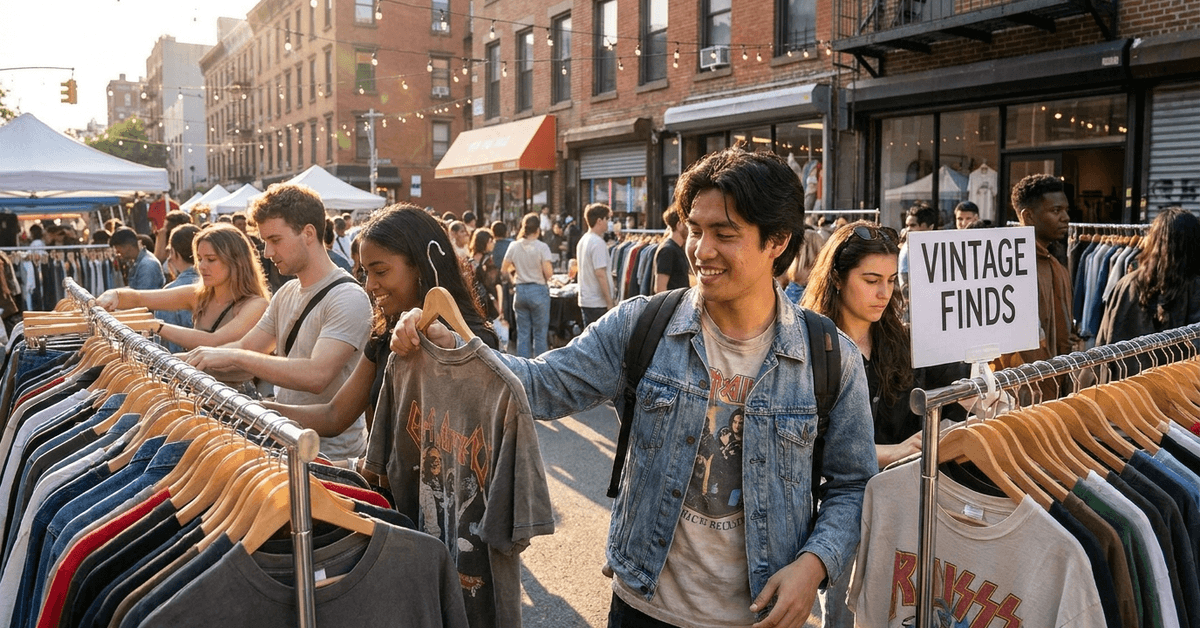
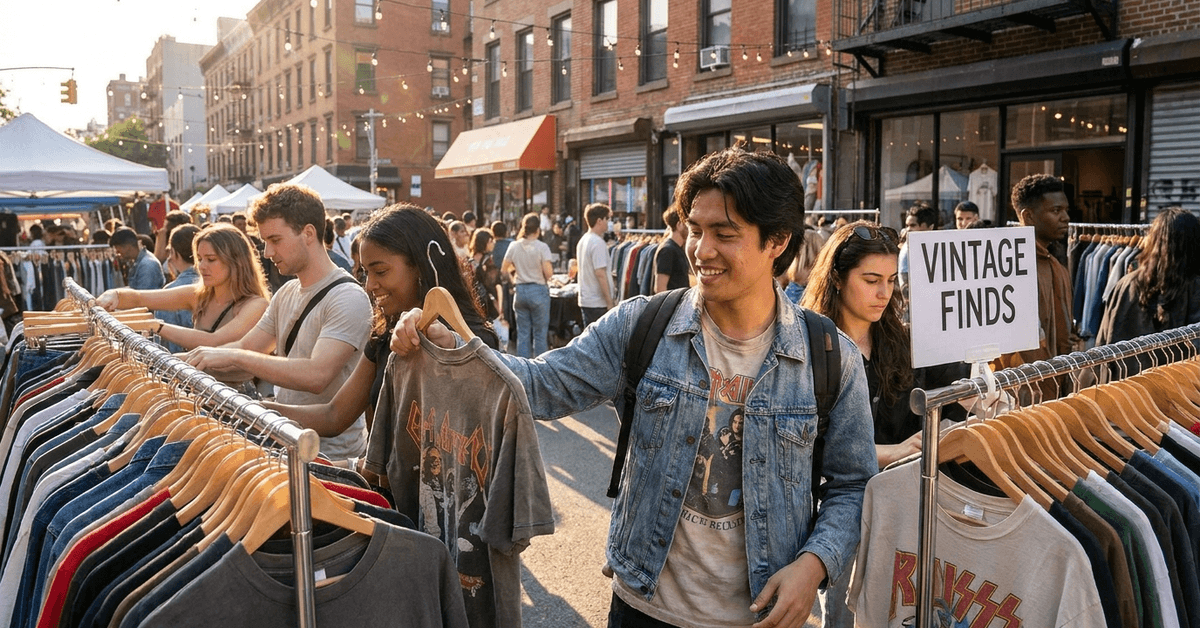
    A 1990s band tee bought on Depop for $55 can look like a stylish daily layer or a costume from a theme party. The difference has nothing to do with the graphic. It comes down to fit, and vintage sizing charts lie to modern buyers.

    Most guides on vintage tees jump straight to “where to buy” and “how to style.” Almost none talk about the single detail that wrecks the look before a single outfit gets assembled: vintage garments run one to two sizes smaller than their modern equivalents.

    This one is for the city commuter who wants to fold a vintage tee into a regular rotation of work-to-bar outfits. Not the collector. Not the reseller. The person grabbing coffee on a Tuesday who wants that tee to look effortless, not accidental.

    Vintage Tee Sizing Runs Nothing Like Modern Cuts

    The tag inside a vintage tee says “Large.” So does the tag inside a 2026 H&M tee. Those two garments will not fit the same body the same way. Vintage cotton shrinks over repeated washes and decades of storage. 

    A 1980s Large often fits closer to a modern Medium, sometimes even a Small.

    Image 1

    This matters because the entire aesthetic of a vintage graphic tee depends on how it sits on the frame. 

    Too tight, and it reads as a shrunken hand-me-down. Too loose, and it crosses into pajama territory. The sweet spot sits in that narrow band between relaxed and intentional.

    The Oversized Look Has a Ceiling

    Going a size up is a popular move right now. Sleeves that hit mid-bicep and a hemline that brushes the belt line: that silhouette works. But push it further, and the tee swallows the person wearing it.

    A partial tuck, sometimes called the French tuck, rescues an oversized tee without adding any structure. One corner of the hem goes into the waistband. The rest falls loose. Rolled sleeves help too, pulling the shoulder seam back toward where a tailor would have placed it.

    I’d be cautious about buying vintage tees online without checking the chest width measurement rather than the tag size. A listed “XL” from a 1985 screen-printed run can measure 20 inches across the chest flat. 

    Cropped and Fitted Tees Still Have a Place

    Cropped vintage tees pair well with high-waist trousers or jeans, especially in warmer months. The crop doesn’t have to be extreme. Even a hemline that lands at the natural waist creates the right proportions for layering under a blazer or open shirt.

    Some city shoppers cut their own vintage tees to get a custom crop. A straight horizontal cut about two inches above the original hem is the easiest alteration. No sewing required. The raw edge becomes part of the look over time.

    Sourcing Real Vintage Tees (Not $80 Reproductions on Depop)

    The hunt for a good vintage graphic tee splits into two worlds: physical stores and online platforms. Both have traps. The biggest one? A massive chunk of what sells as “vintage” on apps like Depop is a modern reproduction printed on an artificially distressed blank.

    I think the standard advice to start on Depop or Grailed is backwards for anyone watching their budget. Listings on those apps routinely price basic band tees at $40 to $70, sometimes triple digits for anything with a recognizable logo. 

    A Goodwill or Salvation Army in a less fashionable neighborhood still prices graphic tees between $3 and $8. The selection is less curated, but the value per piece is dramatically better.

    Thrift Stores Outside the Trendy Zip Codes

    The thrift stores inside hip urban districts get picked over daily by resellers who know what sells on Depop. Locations two or three neighborhoods out tend to have slower turnover and deeper racks.

    Chains like Goodwill in the U.S., Oxfam in the UK, and Humana across Europe restock constantly. Timing matters. Weekday mornings tend to have fresher racks than Saturday afternoons.

    Curated Shops vs. Online Marketplaces

    Specialty vintage stores like Beyond Retro in London and Stockholm or Episode in Amsterdam carry pre-selected stock. Prices sit higher than thrift stores but lower than most online marketplace listings. The trade-off: someone already filtered out the junk.

    Online platforms work differently depending on the category:

    Platform Best For Typical Price Range Risk of Reproductions
    Depop Band tees, streetwear $30–$80 High
    eBay Rare collectibles, sports tees $15–$200+ Medium
    Grailed Designer and hype vintage $50–$300+ Low
    Vinted Budget local finds $5–$25 Medium

    The takeaway: Grailed has the lowest reproduction risk because sellers face stricter listing standards, but prices run highest.

    Styling a Vintage Graphic Tee for Everyday City Wear

    A good vintage tee does most of the visual work on its own. The styling around it should stay simple enough that the graphic reads as the focal point, not as one loud element competing with five others.

    Denim and Outerwear Layering

    Denim and vintage tees share a natural language. Straight-leg or ankle-length jeans, in blue or black, work across seasons and cities. A thrifted denim jacket doubles down on the vintage register without making the outfit feel like a costume.

    Blazers shift the same tee into office-adjacent territory, a move common in creative workplaces around Berlin and Toronto. Puffer vests handle colder commutes. 

    A few layering combinations that translate across most city settings:

    • Denim jacket + straight-leg jeans: the default pairing, works almost everywhere
    • Blazer + tailored trousers: shifts the tee toward smart-casual for workdays
    • Open flannel or work shirt + cuffed chinos: a mid-layer that adds texture without bulk

    The constant across all of these layers: keep the color neutral so the tee’s graphic stays the loudest thing in the outfit.

    Footwear Makes or Breaks the Whole Look

    Sneakers are the obvious pairing. Retro runners like the Nike Cortez or Adidas Samba match the era of most vintage tees. Clean white leather sneakers work when the rest of the outfit leans casual.

    Boots change the register entirely. Chelsea boots or plain-toe leather boots push a vintage tee outfit into fall-and-winter territory. The tee tucks or stays untucked based on the trouser rise. High-rise trousers usually look better with a tuck. Mid-rise works either way.

    • Retro sneakers (Cortez, Samba, New Balance 574): match the decade of the tee
    • White leather sneakers: clean base for busy graphics
    • Chelsea boots or lace-up leather boots: cold-weather alternative that holds the same relaxed tone

    Keeping Vintage Cotton Alive After Hundreds of City Washes

    Old cotton is softer than new cotton because the fibers have broken in over years of wear. That softness comes at a cost: vintage fabric is more fragile. Standard hot-water washing and machine drying will fade the graphic and warp the collar inside a season.

    Washing and Storage Basics

    Cold water and air drying are the two rules that matter most. Turning the tee inside-out before washing protects the printed graphic from friction against other garments.

    Diluted white vinegar, about a quarter cup per load, can pull stubborn stains without the bleaching effect of harsh detergents.

    Folding beats hanging for storage. Hangers stretch the neckline of lightweight vintage cotton over time. Flat storage in a drawer or on a shelf keeps the shape intact for years.

    DIY Repairs and Customization

    Small holes near seams can be stitched closed with a needle and matching thread in about two minutes. The repair doesn’t need to be invisible. Visible mending is part of the vintage tee culture in cities like Tokyo and Copenhagen.

    Iron-on patches cover larger holes or stains and add personality at the same time. Fabric paint turns a generic tee into a one-off piece. Light distressing, done by rubbing fine-grit sandpaper across the collar or hem, gives a too-crisp thrift find that broken-in texture.

    One tool worth mentioning: Google Lens can identify unknown band logos, brand marks, or graphic origins from a photo taken in-store. Useful for figuring out whether a $6 thrift find is a mass-produced reprint or something worth grabbing.

    City Events Where Vintage Tees Fit Right In

    Flea markets and vintage fairs are the obvious venue. Barcelona’s Els Encants Market, New York’s Chelsea Flea, and Berlin’s Mauerpark Flea all draw vintage tee hunters on weekends. These events double as both sourcing trips and outfit showcases.

    Music festivals lean heavily on the graphic tee look. London’s outdoor festival circuit runs through summer, and the dress code skews hard toward vintage band tees paired with denim cutoffs or relaxed trousers.

    Swap parties are smaller-scale but gaining momentum in cities like Amsterdam and Melbourne. Bring tees that no longer fit. Leave with someone else’s discarded gem. No money changes hands, which sidesteps the pricing inflation that plagues online resale.

    Questions People Ask About Vintage Graphic Tees

    A few questions come up constantly in thrift store aisles and online forums. These answers cover ground the main article touches lightly.

    • Q: Can I wear a vintage tee to work?
      A tee under a structured blazer passes in most creative and tech workplaces. The graphic should be relatively understated for office settings. A massive skull print reads differently than a faded college logo. Tuck the tee in, add trousers with a clean break, and the outfit moves into smart-casual range.
    • Q: How do I shrink a vintage tee that’s too big?
      A warm (not hot) wash followed by a short tumble dry can pull in about half a size. This is a one-way trip, so test on a tee that’s clearly too large rather than one that’s close to fitting. Repeated heat cycles degrade the graphic print faster than cold washing does.
    • Q: What’s the best season to thrift for vintage tees?
      Late spring and early summer are peak donation seasons in most cities. People clean closets as weather warms up. Thrift store racks fill with t-shirts right around April through June, which means more variety and better odds of finding something good.

    Conclusion

    The vintage graphic tee works best when it looks like a daily habit, not a statement piece. Sizing matters more than the graphic, sourcing matters more than the brand name, and cold water matters more than any fancy detergent. 

    A single well-fitting tee pulled from a $4 thrift bin can anchor a city wardrobe for years. Grab a tape measure, hit a thrift store two zip codes out, and let the rack surprise you.

  • 5 Easy Ways to Style Sweatpants for an Elevated Look

    5 Easy Ways to Style Sweatpants for an Elevated Look

    Every style blog says the same thing: throw a blazer over your joggers, and suddenly you’re fashion-forward. Search “how to style sweatpants” and count the blazer photos. I’d bet money it’s the first suggestion in nine out of ten articles.

    But a blazer draped over saggy cotton sweats doesn’t read as intentional. It reads as a costume. The piece underneath decides whether the whole outfit works or falls apart.

    This one’s for the hybrid worker, the freelancer, the person running between a co-working space and a dinner spot in the same pair of pants. If your city wardrobe needs to flex across six different settings in one day, keep reading.

    The Blazer-Over-Joggers Trick Has a Fabric Problem

    That blazer advice keeps circulating because it photographs well. A styled photo on a curated Instagram grid makes the combo look effortless. But take that same outfit onto an actual sidewalk, and two things break down fast.

    First, cheap fleece-lined sweatpants bunch at the ankles under a structured blazer and create a visual mismatch between the top and bottom halves of the outfit. The blazer says meeting. 

    Image 1

    The sweats say couch. Second, a heavy wool blazer on top of lightweight joggers creates a fabric weight imbalance that pulls the eye downward to the weakest part of the outfit.

    When a blazer does work over sweatpants

    I think the blazer combo can look sharp when the joggers have tapered cuffs and a mid-weight cotton blend, like the styles common around Prenzlauer Berg in Berlin. 

    Neighborhoods like Shoreditch in London have the same preference: the sweatpant itself is already semi-structured before a blazer goes anywhere near it.

    A fitted or slightly oversized blazer in navy or charcoal pairs well here. Unlined blazers in softer fabrics keep the proportions right. But this only works if the sweatpants underneath already pass the “could these be mistaken for trousers from ten feet away” test.

    If the answer is no, skip the blazer entirely. A clean crewneck sweatshirt in the same color as the joggers will do more for the outfit than any jacket stacked on top.

    Monochrome Sweatpants Outfits and the Fabric Weight Rule

    Single-color outfits are popular among city dressers in Amsterdam and Toronto for a reason. An all-black or all-grey look creates a continuous visual line that makes the wearer appear taller and more put-together without requiring any statement pieces.

    The catch? Most monochrome advice stops at “match the colors.” That misses the part that makes or breaks it.

    Matching fabric weights matters more than matching colors

    Pair a heavyweight cotton sweatshirt with thin technical-knit joggers in the same shade of black, and the outfit looks off. The top will look dense and expensive. The bottom will look flimsy. Same color, completely different impression.

    I’d argue this fabric-weight mismatch is why so many people try monochrome, feel like something is wrong, and give up. The fix is pairing pieces that have similar thickness and drape. 

    A medium-weight French terry sweatshirt over medium-weight French terry joggers in charcoal looks like a single intentional outfit. Cotton with cotton. Technical knit with technical knit. The color match only clicks when the fabric match is already there.

    Add matching shoes, either clean trainers or slip-ons in a tone close to the outfit, and the effect compounds. A metallic belt buckle or a pair of sunglasses can punch through without breaking the monochrome line.

    Accessories and Footwear That Carry More Weight Than a Jacket

    Once the sweatpants and top are sorted, the accessories and shoes determine whether the outfit stays casual or tips into something city-appropriate. 

    The right bag or shoe does what a blazer promises but often fails to deliver: it makes the outfit look deliberate.

    Crossbody bags and structured totes for urban days

    Cities like Copenhagen and Seoul have made the crossbody bag a default part of daily outfits. 

    A sleek leather crossbody or a compact structured tote adds a hard geometric shape against the softness of sweatpants. That contrast reads as styled rather than lazy.

    A few accessories that pair well with elevated sweatpants:

    • Leather crossbody bags or mini backpacks with clean lines and minimal hardware
    • Minimalist watches or a single layered necklace (skip stacking five pieces)
    • Tech-friendly backpacks with hidden zippers for commuters who need to carry a laptop

    The goal isn’t to pile on pieces. One or two accessories with structure already shift the look. ShopLook is a useful tool for browsing trending styling combinations filtered by city.

    Footwear is the real anchor of a sweatpants outfit

    I would pick shoes over a blazer every single time when styling sweatpants for city wear. A clean pair of white leather sneakers is common in San Francisco and Barcelona for good reason: they ground the outfit without competing with it.

    Shoe Type Best For Works With
    Chunky sneakers Retro streetwear looks Tapered joggers, oversized tops
    Streamlined loafers Afternoon meetings, dinners Slim-fit sweats, tucked tees
    Minimal Chelsea boots Colder weather, evening outings Monochrome outfits, dark sweats

    Loafers are an underrated pick for sweatpants. They shift the entire outfit away from athleisure and toward something a person might wear to a casual restaurant. The combination feels unexpected, and that’s exactly why it works.

    Materials matter for city walking. Leather and quality canvas hold up across long days on concrete. Suede looks great but stains the first time a puddle catches it.

    Shaping Tricks That Cost Zero Dollars

    A pair of well-chosen sweatpants still needs some intention in how it’s worn. Too-loose joggers with an untucked oversized hoodie can read as “just rolled out of bed” regardless of how nice the individual pieces are.

    The French tuck and the belt bag trick

    The French tuck, where the front of a shirt or hoodie gets tucked into the waistband while the back stays loose, defines the waistline and creates proportion. This small move is everywhere on the streets of Madrid and Chicago, and it takes about three seconds.

    Cinching joggers slightly higher on the waist and letting fabric drape naturally below adds shape. A belt bag worn at the waist adds a horizontal line that breaks up the vertical flow of the outfit and doubles as secure storage for a phone and wallet.

    Layering a cropped denim jacket over a hoodie adds shape without bulk. The jacket’s shorter length draws the eye to the waist, which keeps the proportions working even with relaxed pants below.

    Picking Sweatpants That Don’t Need Rescuing

    The single biggest mistake with sweatpants styling is starting with the wrong pair. A perfectly styled outfit can’t save sweatpants that were designed for sleeping.

    Fabric, cut, and pocket details to check before buying

    Look for these specifics when shopping for sweatpants intended for city wear:

    • Natural fabric blends like cotton-modal or cotton-polyester in a mid-weight construction
    • Tapered leg openings that sit close at the ankle without elastic bunching
    • Hidden pocket zippers for carrying essentials without visible bulges
    • Flat seams and minimal exterior branding (a giant logo across the thigh kills the effect)

    Overly printed or wide-leg styles tend to push the outfit back toward pajama territory. The closer a pair of sweatpants comes to a slim trouser silhouette, the more styling options open up.

    I think the best city sweatpants in 2026 are the ones where a stranger on the subway can’t immediately tell they’re sweats. That sounds counterintuitive. But the whole point of elevated loungewear is that it borrows the comfort of sweats while ditching the look of sweats.

    Surviving a Full Day in City Sweatpants

    A morning-to-night outfit needs to handle weather shifts, unexpected errands, and the general chaos of city life. Cities like Montreal and Melbourne can swing 15 degrees in a single afternoon.

    Moisture-wicking fabrics help on warmer days when walking between transit stops. A foldable tote in a bag or pocket handles the extra layer that gets shed at noon. 

    And a portable stain remover pen is the kind of boring preparation that saves an outfit at least once a month. Cladwell is a useful app for planning outfit combinations around daily weather forecasts.

    Questions People Ask About Styling Sweatpants for City Wear

    These come up often when people start treating sweatpants as a real wardrobe option instead of an afterthought.

    • Q: Can sweatpants look professional enough for a casual office? Tapered joggers in a dark solid color, paired with loafers and a clean button-down, pass in most casual office environments. The fabric needs to be mid-weight or heavier, and the fit should be slim enough to hold a tucked shirt.
    • Q: Are expensive sweatpants worth it for everyday city wear? Price alone doesn’t determine quality. A $40 pair with tapered cuffs, flat seams, and a cotton-modal blend can outperform a $120 pair with loose construction and flashy branding. Check the cut and fabric before checking the price tag.
    • Q: What colors work best for sweatpants in city outfits? Black, charcoal, navy, and olive are the safest picks because they pair with almost any top and shoe combination. Lighter colors like oatmeal or cream work for monochrome outfits but show stains faster in urban settings.
    • Q: How do sweatpants hold up during rainy city days? Cotton absorbs water and stays wet for hours. A polyester-blend or technical fabric jogger handles rain much better. Pairing water-resistant sneakers or Chelsea boots with synthetic-blend sweats keeps the outfit functional through unpredictable weather.
    • Q: Should I size up or down when buying sweatpants for styled outfits? Stick to true-to-size or one size down if the brand runs loose. Oversized sweats can work in monochrome fits but generally look less polished when paired with structured tops or sharp footwear.

    Conclusion

    Sweatpants earn their place in a city wardrobe when the pair itself is chosen carefully. The styling tricks matter, but they can only polish what’s already close to right

    Monochrome outfits, structured accessories, and the right shoes turn a good pair of sweats into a full outfit. Start with the pants, get the fabric and fit locked down, and everything layered on top will land where it should.

  • How to Transition Your Street Style from Summer to Autumn

    How to Transition Your Street Style from Summer to Autumn

    A 7 a.m. subway platform in Toronto hits about 12°C in late September. That same afternoon, the sun pushes the sidewalk temp past 22°C.

    This daily temperature swing is the single biggest wardrobe problem city dwellers face between August and November. And most style advice skips right past it to sell you a new jacket.

    The audience that gets hit hardest: daily commuters who walk, bike, or ride transit and carry everything on their backs. This one is for the backpack-and-sneakers crowd, not the drive-to-the-office set.

    The “Transitional Wardrobe” Myth and the One-Layer Fix

    Every autumn style guide pushes the same line: build a transitional wardrobe. That phrase sells clothes. It doesn’t solve the actual problem, which is a single outfit that works at 7 a.m. and 2 p.m. on the same Tuesday.

    Skip the Shopping Spree, Add One Smart Layer

    I’d argue against buying a dedicated autumn capsule wardrobe, and my reasoning comes down to a specific fabric gap. 

    Image 1

    A lightweight cotton-blend bomber jacket or an unbuttoned utility shirt over a summer tee handles 80% of the temperature range between 10°C and 23°C. That range covers most of September and October in cities like Berlin, San Francisco, and Barcelona.

    The summer clothes already in the closet do the heavy lifting. A fitted tee, a pair of cropped jeans, and sneakers work from June through late October in most temperate cities. The missing piece is one outer layer that ties around the waist or stuffs into a bag without wrinkling.

    Denim jackets still do this job better than almost anything on the market. They breathe when it’s warm, block wind when it’s cool, and look fine balled up on a cafe chair. Cities with rain (Vancouver, Amsterdam, London) call for a water-resistant bomber instead, but the principle stays the same: one layer, not five new pieces.

    What to Pair Under That Single Layer

    The base matters more than the outer layer during this in-between period. A long-sleeve Breton stripe top or a simple button-up shirt gives enough warmth for a cool morning without overheating by noon. 

    Button-ups pull double duty: wear them closed early, then open over a tee as a second skin when the afternoon warms up. Trousers need the same flexibility. Cuffed chinos or cropped jeans sit in a sweet spot where they don’t look like summer shorts or winter armor. 

    Some commuters in cities like Copenhagen and Amsterdam have shifted toward lightweight joggers with zip pockets, which keep a phone and transit card secure during rush hour.

    Fabrics and Colors That Survive a Full Day on City Streets

    Picking the right material matters more than picking the right brand during this season shift. A morning subway, a lunchtime walk, a crowded bar after work: one outfit gets tested across wildly different temperatures and situations in a single day.

    Cotton Blends and Lightweight Wool Over Everything Else

    Cotton-bamboo blend tees resist wrinkles after a full day of sitting, standing, and cramming into bus seats. Heavyweight cotton creases badly. So does linen.

    Lightweight wool-mix sweaters regulate body temperature better than synthetic fleece, which traps sweat during a warm afternoon walk and then turns cold and clammy on a breezy evening patio. 

    The price gap between a synthetic mid-layer and a merino-blend one is usually around €20 to €40 on resale platforms like Vinted, and the difference in comfort across a 12-hour city day is enormous.

    Color Choices That Hide a City Day’s Damage

    This is a detail that fashion-focused articles gloss over completely. Pale summer colors pick up every coffee drip, every construction-site dust cloud, every subway seat smudge. Autumn in a city is dirty.

    Practical picks for daily urban wear:

    • Forest green and deep navy hide stains and pair with almost anything already in a summer wardrobe
    • Mustard yellow adds a pop of warmth without the visibility problems of white or cream
    • Burgundy reads autumn without screaming “seasonal palette change”

    Those four shades mix and match with each other and with black, grey, or white basics. A reader wearing one of these as a top layer over a neutral tee won’t need to plan outfits in advance.

    Footwear When City Streets Turn Slippery

    The first fallen leaves on a wet sidewalk are a specific hazard. Flat-soled canvas sneakers, the summer default, lose grip fast on damp stone or tile. This shift happens almost overnight in cities like Amsterdam and London, usually by mid-October.

    Water-Resistant Sneakers and Chelsea Boots

    Chelsea boots have dominated autumn street style in northern European cities for a reason: they slip on fast, handle rain, and look sharp enough for an evening out. 

    Platform soles help on cobblestones and uneven pavement, which is half the walkable surface in older European city centers.

    Runners who want to keep a sneaker silhouette should look for water-resistant leather or treated canvas uppers. Brands have caught up to the demand here, and most major sneaker companies now carry weather-ready versions of their popular models.

    One small hack for stretching summer shoes into October: a gel insole plus no-show wool-blend socks. The insole adds cushion for colder, harder ground. The wool sock wicks moisture instead of holding it like cotton does.

    Using Apps to Plan Outfits Around Weather Swings

    City weather changes faster than regional forecasts suggest. A coastal city like San Francisco can swing 10°C between neighborhoods on the same afternoon. 

    Checking AccuWeather or the Norwegian YR.no app the night before gives an hour-by-hour breakdown that makes morning outfit decisions take about 30 seconds.

    Style Inspiration Apps Worth Opening

    Instagram location tags for specific neighborhoods (search “#BerlinStreetStyle” or “#TorontoFashion”) show what real people wore that week in that exact city. 

    This beats any editorial roundup because the outfits reflect actual conditions, not a studio shoot.

    Pinterest boards organized by city and season pull up the same kind of local intel. The difference is that Pinterest saves are more curated and easier to scroll quickly while drinking coffee.

    Resale Platforms for Quick Autumn Swaps

    Platforms like Vinted and Depop move fast during seasonal transitions. Late August through mid-September is the window when summer sellers flood those apps with inventory and autumn pieces appear at steep discounts. 

    Selling three summer tops and buying one wool-blend sweater can be a net-zero transaction.

    Packing for Autumn Day Trips and Weekend City Breaks

    A weekend trip to a different city during October demands a different packing approach than a July getaway. The bag needs to be lighter, but the outfit range needs to be wider.

    A carry-on or weekender bag should hold:

    • One versatile jacket that layers over two or three different tops
    • Both a tee and a button-down for flexible morning-to-evening transitions
    • A lightweight scarf that covers shoulders on cold trains or doubles as a blanket on outdoor terraces

    Rolling a packable rain jacket into the bottom of the bag takes almost no space and saves a trip from being ruined by a sudden shower. Cities like Dublin, Brussels, and Hamburg rarely make it through an October weekend without at least one downpour.

    Accessories That Pull Autumn Outfits Together

    A few small additions can push a basic summer outfit into autumn territory without a full wardrobe change. The trick is choosing items that pack flat and serve more than one purpose.

    Worth carrying:

    • A mid-weight scarf that works as a neck wrap, a shoulder cover, or a lap blanket at outdoor cafes
    • A small crossbody bag that keeps a phone and transit card accessible in crowded stations
    • A beanie or bucket hat that adds warmth without messing up a hairstyle

    Frequent cyclists in cities like Copenhagen report that fingerless gloves make a surprising difference on sub-15°C morning rides. They look odd in September. They feel right the first time the wind hits bare knuckles at 7 a.m.

    Accessory Best For Packability Weather Range
    Mid-weight scarf Wind, style, cafe blanket Rolls small 8°C to 18°C
    Crossbody bag Transit security, hands-free Wears on body Any
    Beanie Morning chill, bad hair days Pocket-sized Below 14°C
    Fingerless gloves Cycling, early commutes Pocket-sized Below 12°C

    The scarf does the most work across the widest temperature range, making it the single most useful autumn accessory for a city commuter.

    Questions People Ask About Transitioning Street Style for Autumn

    These are the kinds of questions that come up every September when the weather starts acting unpredictable and the closet feels wrong.

    • Q: Can I still wear summer dresses in early autumn?
      Absolutely. A neutral long cardigan over a sleeveless dress changes the look instantly. Tights or ankle boots add enough coverage for anything above 10°C, and neither takes up much bag space.
    • Q: How do I avoid overdressing on warm autumn afternoons?
      Build the outfit so every upper layer can be removed and carried. A tied jacket around the waist or a scarf stuffed into a tote means the outfit still looks complete with just a tee underneath.
    • Q: What’s the best rain layer for city commuting?
      A packable rain jacket that folds into its own pocket beats an umbrella in crowded transit. Umbrellas are a hazard on busy sidewalks and impossible to deal with on a packed bus or train.

    Conclusion

    Autumn city style works best when the closet stays lean and each piece earns its space across multiple outfits. The gap between summer and winter is shorter than it feels, and one good layer bridges most of it. 

    Spending less on “transitional” pieces and more on versatile fabrics keeps the whole system simple. The best autumn outfit is probably already hanging in the closet, waiting for a jacket on top.

  • How to Fix a Fraying Shoelace Tip at Home

    How to Fix a Fraying Shoelace Tip at Home

    Every shoelace repair guide on the internet starts with the same advice: grab clear tape. That recommendation fails within 48 hours if your shoes see rain, sweat, or a single puddle on a city sidewalk.

    The little plastic cap at the end of a shoelace has a name: an aglet. And aglets don’t just wear down from age. Constant walking on concrete, stepping on and off buses, and cycling through wet streets strips them faster than most people expect.

    This guide is for commuters, bikers, and daily walkers who go through two or three pairs of laces a year and want a fix that survives past the weekend. Not a hack that peels off on Monday morning.

    Why City Walking Shreds Aglets Faster

    Sidewalks do more damage to shoelace tips than almost any other surface. 

    The combination of hard concrete, sharp curb edges, and repetitive motion wears the aglet plastic thinner every single day. Suburban walking on softer paths and lawns spreads the friction more evenly.

    Wet Weather Speeds Things Up

    Rain and slush don’t just get shoes wet. Moisture softens the adhesive holding the aglet to the lace, and once that bond weakens, the plastic tube slides off completely. Cold weather makes the remaining plastic brittle, so it cracks instead of bending.

    Featured Image

    Bike pedals add another friction point that most walkers never encounter. 

    The lace tip catches on the pedal cage during rotation, tugging and fraying the aglet from a different angle than walking alone. City cyclists tend to see double the aglet wear compared to people who only walk.

    Stop Using Clear Tape on Shoelaces

    I would skip clear tape entirely after comparing it to heat shrink tubing and nail polish across a full week of city use. Tape peels. It absorbs moisture. 

    And the adhesive residue it leaves behind makes the lace tip stickier, which attracts lint, grit, and dirt that speed up the next fray.

    Why Tape Fails So Quickly

    The problem is structural. Tape wraps around the outside of the lace, and shoelace tips flex every time they pass through an eyelet. That repeated bending breaks the tape seal within a day or two of regular use. 

    Nail polish and heat shrink tubing bond to the lace fibers themselves, so the fix moves with the lace instead of fighting it.

    Most people reach for tape because it takes 30 seconds. But a nail polish application takes about 90 seconds of active time (the rest is drying), and heat shrink tubing takes under two minutes with a lighter. Saving one minute upfront costs a redo every few days.

    Five Shoelace Tip Fixes Ranked by Durability

    Each of these methods uses supplies that most apartments already have, or that cost less than a replacement pair of laces. The ranking below reflects how long each fix holds up under daily city walking conditions.

    Heat Shrink Tubing: The Longest-Lasting DIY Aglet

    Hardware stores like Home Depot sell heat shrink tubing in small diameters for under $5 a pack. The process is simple: trim the frayed end clean, slide a 2 to 3 cm piece of tubing over the tip, and warm it with a lighter or hairdryer while rotating the lace slowly.

    The tubing shrinks tight around the lace fibers and creates a seal that flexes without cracking. This method lasts the longest of any home repair option and produces a result that looks close to a factory aglet.

    One thing to watch: hold the flame about 3 cm away from the tubing and keep rotating. Direct contact melts the tubing unevenly and can scorch the lace underneath.

    Nail Polish Layering: Surprisingly Tough

    Clear nail polish is the second-best option and the easiest to find in most households. Trim loose threads first, then apply two to three coats with full drying time between each coat. The dried polish creates a hard, glossy shell around the lace tip.

    The fix holds well against dry friction but breaks down faster in wet conditions than heat shrink tubing. A single heavy rain can crack a thin coat, so the multiple layers matter.

    Super Glue and Paper Wrap

    A more aggressive fix for laces that are already too damaged for polish alone. 

    Cut away all loose threads, wrap a thin strip of paper (a business card works) tightly around the tip, then seal with a drop of super glue. Hold firm for 30 seconds until the bond sets, and trim any excess paper.

    The result is stiff, functional, and ugly. It gets laces through eyelets, but the paper wrap adds bulk that can make tight-fitting eyelets harder to thread.

    Wax Coating: Good Enough for Travel

    Candle wax or beeswax rubbed over a frayed tip creates a temporary seal that travels well. Warm the wax slightly, press it around the lace end, and shape it into a point while it cools. 

    The fix holds for a few days of light use, which makes it useful for trips but not for daily commuting.

    Clear Tape: A Temporary Patch (at Best)

    Tape goes last on this list for a reason. A 4 to 5 cm strip wrapped tightly around the tip looks clean for about a day. 

    After that, moisture, friction, and bending start peeling the edges. The sticky residue left behind traps dirt and weakens the lace fibers underneath.

    The comparison across all five methods breaks down like this:

    Method Active Time Estimated Durability Supplies Needed
    Heat shrink tubing ~2 minutes Several weeks to months Tubing, lighter or hairdryer
    Nail polish (3 coats) ~90 seconds + drying 1 to 3 weeks Clear nail polish, scissors
    Super glue + paper ~2 minutes 2 to 4 weeks Super glue, paper strip, scissors
    Wax coating ~1 minute 3 to 5 days Candle wax or beeswax
    Clear tape ~30 seconds 1 to 2 days Clear tape

    Heat shrink tubing wins on durability by a wide margin, and the two-minute time investment pays off within the first week.

    The Section of Lace Nobody Repairs

    Most aglet fixes focus on the last centimeter of the lace: the tip itself. But the 2 to 3 cm of lace directly above the aglet is where the next fray starts. 

    Once the original aglet cracks or falls off, that section of lace has already been weakened by repeated flexing inside the bottom eyelet.

    I think applying nail polish or heat shrink tubing to just the tip is a mistake when the 3 cm section above it on a standard cotton lace is already showing fiber separation. The fix should cover at least 2 cm past the original aglet line.

    This is why heat shrink tubing works so well. A 2 to 3 cm piece covers the tip and the weak zone above it, reinforcing the full stress area. Tape and wax can only coat the very end.

    When Replacing Laces Beats Repairing Them

    Some laces are past saving. If the fray extends more than 4 cm up from the tip, or if the lace material itself feels thin and stretched, no home fix will hold for long. Replacement is the faster and cheaper option at that point.

    Brands that sell laces with reinforced aglets tend to hold up better under city conditions:

    • Dr. Martens replacement laces come with metal-tipped aglets that resist sidewalk friction
    • Adidas flat laces use a heat-sealed aglet that handles wet conditions well
    • Shoe repair directories on Citymapper can locate cobblers and shoe repair shops nearby when a quick replacement is needed

    A spare set of laces in a daypack or desk drawer eliminates the morning scramble entirely. Keeping two pairs in rotation also spreads wear across both sets, roughly doubling the life of each.

    Budget replacement laces from supermarkets often use thinner aglet plastic that cracks within a month. Spending an extra dollar or two on brand-name laces or buying from a dedicated shoe repair shop makes a measurable difference.

    Questions People Ask About Fixing Fraying Shoelace Tips

    These are the searches that keep coming up around shoelace repairs, and a few answers that go beyond the obvious.

    • Q: Can hot glue fix a frayed shoelace tip?
      Hot glue can work in a pinch, but it dries thick and lumpy. Threading the lace through small eyelets becomes difficult, and the glue tends to crack after repeated bending. Super glue with a paper wrap produces a thinner, tighter result.
    • Q: How do I fix shoelace tips without heat?
      Nail polish and super glue both work at room temperature. Nail polish needs two to three coats with drying time between each, while super glue sets in about 30 seconds. Wax can also be softened with hand warmth alone.
    • Q: Do metal aglet tips last longer than plastic ones?
      Metal aglets outlast plastic by a large margin, especially on boots and heavier shoes. Dr. Martens and some hiking boot brands include metal tips as standard. Aftermarket metal aglet kits are also sold online for a few dollars per set.

    Conclusion

    Fraying aglets seem minor until a lace refuses to thread through an eyelet ten minutes before work. Heat shrink tubing takes two minutes and lasts longer than any other home method by a wide margin. 

    The tape-first instinct costs more time in repeated fixes than spending those extra 90 seconds on a real repair. Carry a spare pair of reinforced laces, and the problem mostly stops coming back.

  • Streetwear Basics: 5 Essential Items Every Closet Needs

    Streetwear Basics: 5 Essential Items Every Closet Needs

    A single city day can throw five different dress codes at you. Morning subway, afternoon meeting, rooftop drinks, a walk through a night market, then a rainy sprint to the last train home.

    Most streetwear guides list products. They skip the part where your outfit has to survive 14 hours of unpredictable weather, packed trains, and concrete.

    This one is for the daily commuter who treats getting dressed like solving a logistics problem. If a wardrobe piece can’t pull double duty across at least two city contexts, it doesn’t earn closet space.

    The Hoodie Gets Too Much Credit and Too Little Thought

    Everyone recommends a hoodie. Fair enough. But the conversation usually stops at “get a black one,” and that’s where the bad purchases start.

    Cotton-Poly Blends and the Grime Factor

    A cotton-poly blend resists city grime better than 100% cotton. Pure cotton absorbs sweat, pollution, and that mysterious subway smell within a few wears. 

    A 60/40 or 70/30 cotton-polyester mix holds its shape wash after wash and dries faster after getting caught in the rain.

    Image 1

    Color matters too, but not for the reasons style blogs suggest. Black and navy work because they hide the micro-stains that come from leaning on railings, brushing against walls, and sitting on public benches. It sounds unglamorous. That’s the point.

    Pockets and Hoods That Do Something

    A kangaroo pocket fits a phone and a transit card without bulging. Lined hoods add warmth on windy corners between buildings, where wind tunnels hit hardest.

    Zippered hoodies let you shed a layer on a crowded bus without pulling fabric over your head and elbowing someone in the face.

    I’d pick a zip-over hoodie for cities like New York or Tokyo where trains run hot even in winter. A pullover works better in consistently cold places like Berlin or Chicago, where removing layers mid-commute happens less often.

    Sneakers: Stop Overspending on a Single Pair

    The standard advice says to invest in one high-end pair of sneakers. I think that advice falls apart in cities like London or Toronto, where wet sidewalks, metro stairs, and daily mileage of 8,000+ steps chew through even premium soles within six months.

    Rotation Beats Price Tag

    Two pairs of mid-range sneakers in rotation will outlast one expensive pair every time. The logic is simple: letting shoes dry and decompress for 24 hours between wears extends their lifespan dramatically. 

    Alternating between an Adidas Stan Smith and a Veja Campo, for example, means neither pair hits the replacement point as fast.

    Cushioned insoles matter more than brand prestige when the day involves standing on a subway platform, walking eight blocks, climbing office stairs, and then doing it all in reverse. 

    Look for that detail on the product page. It tells you more than the marketing copy ever will.

    Traction on Wet City Surfaces

    Rubber outsoles with grooved tread patterns prevent slipping on marble metro floors and rain-slicked sidewalks. Flat-soled sneakers look clean but become a liability the moment weather turns. This is a spec most people check last, if they check it at all.

    Neutral colors add the most outfit flexibility. Classic white pairs with everything from cargo pants to dark jeans. A second pair in grey or black handles the dirtier commute days without showing wear.

    Cargo Pants, Bags, and the Gear That Does the Real Work

    Pants and bags are the unglamorous half of a city wardrobe. Nobody posts them on mood boards. 

    But they carry your phone, wallet, keys, charger, headphones, and snacks through a 14-hour day, and the wrong choice means fumbling through a backpack on a moving train.

    Cargo Pants and Relaxed-Fit Jeans Compared

    Feature Cargo Pants (e.g., Carhartt Relaxed) Relaxed-Fit Jeans
    Pocket count 6-8 pockets, including side and thigh 4-5 standard pockets
    Mobility Loose cut, good for cycling and stairs Stiffer fabric, less range of motion
    Stain resistance Twill and canvas resist marks well Denim shows stains on lighter washes
    Cold weather layering Fits thermals underneath without bulk Tighter fit limits under-layers
    Best city use Tech-heavy days, festivals, bike commutes Office-casual, evening plans

    Cargo pants win on pure utility. Relaxed jeans win on versatility across more formal settings. A one-pair-only commuter should lean toward dark jeans. A two-pair setup benefits from having both.

    Crossbody Bags Over Backpacks

    Crossbody and sling bags solve a problem backpacks create: access. Reaching into a backpack on a crowded train means either removing it entirely or doing an awkward shoulder twist. 

    A crossbody bag sits at hip level, and the zip compartment faces your body, which adds a layer of anti-theft security in crowded markets and transit stations.

    Three things to check before buying:

    • Padded strap width: anything under 2 cm digs into the shoulder after an hour of walking
    • Waterproof material: nylon or coated polyester handles sudden rain without soaking through to electronics
    • Compact profile: the bag should tuck against your torso, not swing wide in tight spaces

    Brands like Herschel and Eastpak have city-tested models, though generic waterproof sling bags on Amazon often perform just as well for half the price.

    Graphic Tees and Layering for Variable Weather

    A graphic tee and a layering strategy turn three pieces into a full week of outfits. This is where a small wardrobe starts to punch above its weight.

    Graphic Tees as a Personality Layer

    A graphic tee adds character to an otherwise neutral outfit. Anime-art tees dominate Tokyo street style. Music and band tees run Los Angeles. Small local print shops in cities like Brooklyn produce designs that mass brands can’t replicate.

    The fabric matters here too. Soft, breathable cotton in a slightly relaxed fit layers better under jackets and over long-sleeve thermals than a stiff, boxy blank. A fitted tee rides up under a hoodie. A relaxed one sits flat.

    Layering for Cities That Change Weather by Afternoon

    A plain white tee or thermal Henley goes under hoodies or light jackets. This two-layer base handles the temperature swings between outdoor wind and overheated indoor spaces.

    For rain-prone cities like Seattle or Dublin, a lightweight waterproof jacket that packs into its own pocket takes up almost no bag space. Pair it with:

    • A beanie or bucket hat for wind and light rain coverage
    • Adjustable cuffs and drawstrings on outer layers, so fit tightens when weather worsens
    • Packing cubes inside a day bag to keep dry clothes separate from damp layers

    That last point sounds obsessive. But pulling a dry tee out of a structured cube after getting soaked on a morning commute changes the entire day.

    Putting Outfits Together on a Tight Rotation

    Owning fewer pieces means each one needs to pair with almost everything else. A dark hoodie, white sneakers, olive cargo pants, and two graphic tees already create four or five distinct combinations just by swapping one element.

    Tools That Make Mixing Easier

    Pinterest boards organized by city or season help visualize pairings before buying anything new. 

    Weather apps like AccuWeather guide layering decisions: a 10°C morning and 18°C afternoon in the same city means the jacket stays in the bag, not on a hook at home.

    Fashion communities on Reddit, especially r/streetwear and r/malefashionadvice, post fit-check photos tied to specific cities and events. 

    That kind of context beats a generic style guide because the outfits exist in real weather, on real transit, and in real neighborhoods.

    Questions People Ask About Streetwear Essentials

    These come up a lot, and a few answers might save a bad purchase.

    • Q: How many sneakers do I need for a city wardrobe? Two pairs in rotation is the sweet spot. One neutral pair for daily wear and one darker pair for rain or rough days. Going below two means each pair wears out in half the time.
    • Q: Are cargo pants still in style for 2026? Cargo pants have moved past trend cycles at this point. Brands like Carhartt and Dickies keep producing relaxed-fit cargos because commuters and festival-goers keep buying them for the pocket utility alone.
    • Q: What size crossbody bag works best for city commuting? Stick to bags under 4 liters for daily carry. Anything larger starts to bounce and shift during walks. The bag should hold a phone, wallet, keys, and earbuds without needing to be stuffed full.
    • Q: Can graphic tees work in a semi-casual office? Layered under a clean jacket or overshirt, a subtle graphic tee passes in most creative and tech offices. Loud all-over prints are harder to dress up. A small chest logo or minimal line art blends better.
    • Q: Do I need a waterproof jacket if I carry an umbrella? An umbrella does nothing when wind hits sideways, and it occupies a hand on crowded sidewalks. A packable waterproof jacket folds into a bag pocket and keeps both hands free for transit cards and phone maps.

    Conclusion

    Streetwear built for real city use comes down to pieces that handle weather, crowds, and long hours. 

    The temptation to chase trends fades once a small, functional rotation clicks into place. Every item earns its spot by working across multiple parts of the day. Start with the pieces that solve your commute, and style fills in around them.

  • The Ultimate Guide to Wearing Flannel Shirts in Urban Fashion

    The Ultimate Guide to Wearing Flannel Shirts in Urban Fashion

    Every menswear blog in 2026 tells you the same thing about flannel: go slim-fit, keep it buttoned, treat it like a casual dress shirt. That advice falls apart the moment you step onto a crowded morning train with a backpack and a coffee.

    Flannel has a reputation problem. Most style guides file it under “fall weekend wear,” which completely ignores what makes the fabric useful for the other nine months of city living.

    This one is for the commuter who walks 20 minutes to the station, rides transit for 40, and sits in a coworking space by 9 AM. That temperature swing across a single morning is where flannel earns its place over a hoodie or a cotton button-down.

    A good flannel shirt solves a specific wardrobe problem that no single alternative handles as well. And the way most people buy them creates its own set of issues.

    Why Flannel Performs Better Than a Cotton Button-Down on Transit

    The standard recommendation for men who want to look “put together” on a city commute is a fitted cotton button-down. Clean lines, professional enough, pairs with anything. 

    I’d pick flannel over a cotton Oxford for daily transit wear after comparing how both fabrics handle a week of packed subway rides and rain-soaked walks. 

    Cotton button-downs wrinkle within an hour of sitting on a train. Flannel’s brushed texture hides creasing and wear marks in a way that smooth-weave fabrics cannot.

    How Flannel Handles Temperature Swings Between Underground and Street Level

    The gap between an air-conditioned subway car and a 28°C sidewalk in June is brutal on clothing choices. A flannel shirt, worn open over a T-shirt, acts as a removable insulation layer. Pull it on underground. Push the sleeves up outside.

    Image 1

    Cotton button-downs don’t work this way because they’re designed to be worn buttoned and tucked. The moment you unbutton one and roll the sleeves, it looks sloppy. An unbuttoned flannel looks intentional.

    Flannel’s Texture Hides City Wear

    Commuters deal with backpack strap friction, splashes from puddles, and coffee spills at least once a week. 

    A cotton shirt shows every mark. Flannel’s raised fiber surface and busy plaid patterns absorb minor stains and abrasion without broadcasting them to the office.

    That matters for anyone who doesn’t have time to change between the commute and a meeting. The shirt that looked clean at 7 AM needs to still look clean at noon. Flannel clears that bar more often than any other casual shirt fabric.

    Flannel Outfit Pairings That Work Beyond October

    The seasonal box that flannel gets stuffed into is one of the biggest blind spots in urban menswear. A heavy wool-blend flannel? Sure, that’s a cold-weather piece. But a lightweight cotton flannel in a muted pastel or gray plaid is a three-season shirt.

    Spring and Summer Flannel: Lighter Than People Expect

    A thin flannel in a washed-out blue or sage green, worn unbuttoned over a white crew-neck tee, works in Barcelona in April or Vancouver in May. The shirt weighs almost nothing. It blocks a light breeze. It rolls up small enough to stuff in a bag.

    I think the advice to retire flannel after March ignores brands like Uniqlo’s flannel line, which has offered lightweight flannel shirts since at least 2023 at price points under $30. Those shirts weigh less than most hoodies.

    The pairing is simple for warm-weather cities: light flannel, straight-leg chinos or joggers, and a pair of clean white sneakers. Skip the boots until October.

    Cold-Weather Layering: Flannel Under a Puffer or Overcoat

    Colder cities like Stockholm or Montreal demand more structure. A mid-weight flannel in forest green or deep burgundy layers under a puffer vest or wool overcoat without adding bulk. 

    The brushed surface creates friction against the outer layer, so the flannel stays in place instead of bunching at the waist.

    Pair a dark flannel with black slim jeans and chukka boots for a look that moves from a morning commute to an evening bar without needing a wardrobe change.

    Buying Flannel for City Life: Weave, Buttons, and Fit

    Not all flannel shirts are built for regular urban use. The difference between a $15 fast-fashion flannel and a $50 mid-range one usually comes down to three things: weave tightness, button quality, and seam construction

    A loose weave pills within a month of backpack use. Plastic buttons crack. Weak seams at the shoulder split under strap pressure.

    What to Check at the Store or Online Listing

    A few details separate a flannel that lasts two seasons from one that falls apart after six washes:

    • Button material: Metal or thick resin buttons survive machine washing. Thin plastic ones don’t.
    • Shoulder seam placement: The seam should sit right at the shoulder bone, not an inch inward. A dropped seam creates a sloppy look under jackets.
    • Hem length: A flannel meant to be worn untucked should hit mid-fly. Anything longer looks like a nightshirt. Anything shorter rides up when you reach for overhead handles on the train.

    Secondhand Flannel Fits Better (and Costs Less)

    Apps like Vinted and Depop have made secondhand flannel shopping ridiculously efficient. A broken-in flannel shirt that someone wore for a season has already gone through its shrinkage cycle. The fit you see in the listing photo is the fit you’ll get.

    New flannel, especially from budget brands, can shrink up to half a size after the first hot wash. That’s why a size-medium flannel bought new sometimes fits like a small after a month. Buying secondhand sidesteps this entirely.

    Feature Budget Flannel (Under $20) Mid-Range Flannel ($35 to $60)
    Weave density Loose, pills quickly Tight, resists pilling
    Buttons Thin plastic Resin or metal snap
    Shrinkage after first wash Noticeable (up to half size) Minimal if pre-washed
    Expected lifespan 1 season of regular wear 2 to 3 seasons

    Budget flannel works for occasional wear. Daily commuters should spend more or buy quality secondhand pieces.

    Caring for Flannel in a Small City Apartment

    Laundry routines differ when the “laundry room” is a stacked washer-dryer in a closet or a shared machine in the basement. Flannel needs colder water and gentler cycles than most people give it.

    Washing Without Shrinkage or Fading

    A cold wash on a gentle cycle keeps flannel soft and prevents the colors from bleeding. Hot water is the single biggest destroyer of flannel shirts. It tightens the fibers and fades plaid patterns within three or four washes.

    Skip the dryer entirely if possible. Hanging a flannel shirt on a door hook or a drying rack overnight keeps the fabric relaxed and avoids the stiffness that tumble drying creates. Apartments with limited space can use a retractable clothesline in the shower.

    Storing flannel folded rather than hung prevents hanger bumps at the shoulders. A shelf or drawer in a ventilated area is better than a packed closet. Small apartments trap moisture, and flannel absorbs odors faster than synthetic fabrics.

    Matching Flannel to Specific City Moods

    Different cities pull different things out of a flannel shirt. A red-and-black buffalo check reads grunge in Portland and lumberjack-costume in Paris. Pattern selection should match where the shirt gets worn most.

    A few city-specific notes worth keeping in mind:

    • London and Amsterdam: Muted earth tones (olive, charcoal, brown) blend with the overcast palette and look sharp on a bike.
    • New York and Berlin: Bolder patterns and oversized fits lean into the streetwear energy of both cities.
    • Melbourne and Toronto: Mid-tone plaids in blue or green work across the unpredictable weather swings both cities are known for.

    My take on flannel color: I’d skip red plaid entirely for city use in 2026. Red buffalo check has become a costume piece. Charcoal, navy, and muted green plaids look current without trying.

    Questions People Ask About Flannel Shirts for City Wear

    These come up a lot, and a couple of the answers might save a bad purchase.

    • Q: Can flannel shirts be worn in summer in the city? Absolutely, but fabric weight matters. A lightweight cotton flannel worn open over a tee weighs about the same as a thin hoodie. Avoid wool-blend flannels until temperatures drop below 15°C.
    • Q: Are flannel shirts appropriate for a business-casual office? A solid or subtle plaid flannel in navy, charcoal, or olive can pass in most business-casual settings. Pair it with chinos and leather shoes rather than jeans and sneakers. Loud plaids and oversized fits won’t clear the bar.
    • Q: How often should I wash a flannel shirt? Every three to four wears is a reasonable cycle unless the shirt picks up visible stains or odors. Overwashing breaks down the brushed fibers and fades color faster. Spot-cleaning small marks between washes extends the shirt’s life.
    • Q: Does flannel shrink every time it’s washed? Most shrinkage happens during the first wash, especially in hot water. After that initial cycle, a cold-wash routine keeps the fit stable. Pre-washed or secondhand flannels have already gone through this stage.
    • Q: Is it better to buy flannel new or secondhand? Secondhand flannel from apps like Vinted has already been through its shrinkage phase, so the fit is more predictable. New flannel is fine too, but size up if the brand doesn’t specify pre-washing.

    Conclusion

    Flannel shirts solve a real wardrobe gap for people who commute, layer, and move through different settings daily. The fabric handles temperature swings and physical wear better than cotton button-downs or hoodies. 

    Picking the right weight, fit, and color for a specific city keeps the shirt looking intentional rather than accidental. A single well-chosen flannel can pull more duty across a week than most items hanging in a city closet.

  • How to Style an Oversized Hoodie Without Looking Sloppy

    How to Style an Oversized Hoodie Without Looking Sloppy

    Nine out of ten oversized hoodie outfits fail at one place: the hip line. The hoodie either stops too high and looks like a regular fit, or drops past the thigh and reads as a nightgown.

    Most styling advice skips this measurement problem entirely and jumps straight to shoe recommendations. But the length of the hoodie relative to the body is the first thing a stranger’s eye catches on the sidewalk.

    This one is for the daily commuter, the weekend city walker, the person who already owns two or three oversized hoodies and still feels like something looks off every time they check a window reflection.

    The Proportion Problem Starts at the Shoulder Seam

    A hoodie labeled “oversized” can mean a dozen different things depending on the brand. Some add width across the chest. 

    Others extend the torso length. A few just scale up every measurement uniformly, which creates a boxy shape that swallows most frames.

    The shoulder seam tells the story first. A dropped shoulder that sits one to two inches past the natural shoulder point gives the relaxed look without making the torso disappear. 

    Push that drop to three or four inches and the sleeves start bunching at the wrist, the chest panel sags, and the whole thing looks borrowed from someone twice your size.

    Featured Image

    Sleeve Length Decides “Intentional” or “Accidental”

    Cuffs that land at the wrist bone read as intentional. Cuffs that cover half the hand create that “kid wearing dad’s clothes” silhouette. 

    Rolling sleeves helps, but a rolled cuff on a thick fleece hoodie adds bulk to the forearm. If the hoodie needs rolling every single time, the size is wrong.

    Hip-Length is the Safe Zone

    The bottom hem should sit just below the hip. This leaves enough room for the hoodie to drape without covering the entire backside. Once a hoodie drops to mid-thigh, the proportions shift and the bottom half of the outfit becomes almost invisible. 

    I would pick a hoodie that hits two inches below the natural waist over one that grazes the knee, because that mid-thigh length forces a very specific styling approach (tucking, belting, or wearing with no pants visible) that limits the outfit to one look.

    Skinny Jeans Are Not the Answer to Every Oversized Top

    The standard advice runs like this: big on top, slim on bottom. Balance proportions. Grab your skinniest jeans and call it done.

    I think the skinny-jean-with-oversized-hoodie formula creates a top-heavy silhouette that looks more like a costume than a real outfit, especially when paired with bulky sneakers at the bottom. 

    Straight-leg pants do the same proportional work without the exaggerated contrast. A straight-leg jean or a tapered chino creates a clean line from hip to ankle that lets the hoodie’s volume look deliberate instead of accidental.

    Structured Trousers Change the Entire Read

    A pressed trouser or tailored jogger under an oversized hoodie shifts the outfit from “running errands” to “chose this on purpose.” The contrast between a soft, relaxed top and a crisp bottom does the heavy lifting. 

    Cities like Paris and Copenhagen have run this combination for years. Avoid doubling up on volume. Wide-leg pants under an oversized hoodie add fabric everywhere and the outfit loses its shape entirely. 

    The eye has nothing to anchor to. That combo works in editorial shoots with specific lighting and professional styling, but on a Tuesday morning train platform, it reads as pajamas.

    Leggings and Bike Shorts: Context Matters

    Leggings work under an oversized hoodie if the setting matches. A Saturday morning coffee run or a gym-to-brunch transition makes sense. 

    A work meeting or a dinner reservation does not. Bike shorts follow the same rule. The athleisure read is strong with both, and that limits where the outfit goes. 

    Picking bottoms based on the day’s schedule, not just proportion rules, saves a lot of awkward moments.

    Layering That Adds Shape Instead of Bulk

    Throwing a jacket over an oversized hoodie can go two directions. A structured coat (wool overcoat, leather jacket, fitted bomber) compresses the hoodie’s volume and gives the outfit a defined silhouette. 

    An oversized jacket over an oversized hoodie doubles the problem. The layering piece needs to be shorter or the same length as the hoodie, or long enough to clearly extend past it. 

    A jacket that ends at exactly the same hemline as the hoodie creates a visual stacking effect that looks unfinished. There should be a visible gap or a clear length difference between the two layers.

    The Undershirt Trick for Cold Cities

    A fitted long-sleeve shirt or a mock neck underneath the hoodie adds a collar element that breaks up the neckline. 

    The hoodie’s opening sits wider, so a visible collar or turtleneck edge underneath creates a layered look without adding outer bulk. Toronto winters and Copenhagen autumns make this combination practical, not just stylistic.

    One Accessory Does More Than Three

    Crossbody bags, beanies, scarves, caps, chain necklaces: the accessory list gets long fast. 

    But the single strongest move is one structured bag. A crossbody or a compact messenger bag worn across the chest creates a diagonal line that breaks up the hoodie’s rectangle shape.

    Loading up on accessories tends to clutter an already relaxed silhouette. A beanie plus a crossbody plus a chain starts competing for attention. Pick one piece that adds structure, and let the hoodie do the rest.

    Some items that pair well without overcrowding:

    • A compact crossbody bag in leather or nylon worn diagonally across the chest
    • A fitted baseball cap or bucket hat that echoes the outfit’s color palette
    • A single ring or a minimal watch, nothing that jingles or catches light aggressively

    Footwear That Anchors an Oversized Hoodie Outfit

    Shoes are the second thing people notice after the overall silhouette. The wrong pair can undo a well-styled hoodie outfit faster than any other element.

    Chelsea boots have the cleanest pairing with oversized hoodies because their slim profile and ankle height create a defined stopping point for the eye. The outfit gains a bottom anchor that reads as deliberate. 

    Chunky sneakers can work, but they add visual weight at the base, which combined with the hoodie’s volume on top, creates a mushroom-shaped outline.

    Minimalist white sneakers are a safe default. They match almost any hoodie color and keep the overall look clean. Skip the neon runners and cross-trainers unless the entire outfit leans athletic.

    For rainy cities like Seattle or London, waterproof leather boots keep the polished look intact. Rain-soaked canvas sneakers ruin both the aesthetic and the shoe.

    Shoe Type Best Paired Bottoms City Setting Formality Level
    Chelsea boots Straight-leg jeans, tailored trousers Paris, London, Copenhagen Smart casual
    Minimalist sneakers Chinos, joggers, jeans Berlin, NYC, Tokyo Casual
    Waterproof boots Any pant style Seattle, London, Amsterdam Casual to smart casual
    High-top sneakers Cargo pants, straight jeans Tokyo, Seoul, NYC Streetwear

    High-top sneakers lean the outfit toward streetwear territory, which suits cities like Tokyo and Seoul where that look blends into the local style.

    Color and Texture: The Quiet Decisions That Separate Good From Sloppy

    Solid colors in muted tones (black, cream, olive, charcoal, navy) are the easiest starting point. Berlin’s streetwear scene leans heavily on neutrals, and there’s a reason: a single-color hoodie in a muted shade looks cleaner than a graphic-heavy design in most city contexts.

    Graphic hoodies have a place, but the rest of the outfit needs to stay simple. A loud hoodie over patterned pants creates visual noise that flattens the outfit. Keep the graphic as the focal point and build everything else around it in solid tones.

    Texture mixing gives oversized hoodie outfits depth without adding color complexity. A cotton fleece hoodie over faux leather leggings or under a wool overcoat creates tactile contrast that makes the outfit feel considered. These combinations work because the fabrics have different weights and sheens, and that variation tells the eye the outfit was built intentionally.

    For warmer months, lightweight french terry hoodies in cream or white pair well with linen trousers. The fabric won’t trap heat the way a heavy fleece does, and the drape stays relaxed without getting soggy.

    Keeping an Oversized Hoodie Looking New in City Conditions

    City grime, public transit seats, and crowded cafés put hoodies through more wear than suburban life does. A hoodie that pills, fades, or stretches out loses its styling potential fast.

    Care steps that extend a hoodie’s life:

    • Turn the hoodie inside out before washing to protect the outer surface and any printed graphics
    • Use a mesh laundry bag on a cold, gentle cycle to prevent stretching
    • Air dry flat on a clean towel instead of hanging, which pulls the shoulders out of shape
    • Hang the hoodie in a ventilated space after wearing it (not crumpled in a gym bag) to prevent odor buildup between washes

    A good quality oversized hoodie should hold its shape for a full year of regular city wear if it avoids the dryer. The dryer is the single biggest killer of hoodie structure. 

    The heat shrinks the body unevenly, tightens the cuffs, and causes pilling across the chest. Air drying takes longer but keeps the fit intact.

    Questions People Ask About Styling Oversized Hoodies

    These come up constantly, and most are easier to answer than people expect.

    • Q: Can an oversized hoodie work for a smart casual dress code? Layer it under a tailored blazer or a wool overcoat and pair it with pressed trousers and Chelsea boots. The structured layers around the hoodie shift the formality level up. Stick to solid, neutral hoodie colors for this combination.
    • Q: Do oversized hoodies look good on shorter body types? A hoodie that stops at or just below the hip works for shorter frames. Anything longer starts to shorten the legs visually. High-waisted bottoms help offset the volume by raising the visual midpoint of the body.
    • Q: What is the best hoodie fabric for year-round city wear? Mid-weight french terry handles most seasons. It breathes in spring and fall, layers comfortably in winter, and drapes better than heavy fleece. Pure cotton or cotton-poly blends in the 280 to 350 GSM range tend to hold up the longest.

    The difference between a sloppy oversized hoodie and a sharp one comes down to about four deliberate choices. Proportion, bottom pairing, one structured accessory, and clean footwear solve most outfit problems. 

    Skip the Pinterest rabbit hole of “hoodie outfit ideas” until the basics feel automatic. And when the dryer beckons on a cold night, remember: that 40 minutes of heat will cost the hoodie six months of structured shape.

    Conclusion

    Proportion at the shoulder and hip line matters more than any individual item you add to the outfit. Straight-leg bottoms and one structured bag will do more work than five accessories fighting for attention.

    The cities where oversized hoodies look best are the ones where people treat the fit as a starting point, not an afterthought. Take the four decisions seriously, and the hoodie stops being loungewear that escaped the apartment.

  • How to Style Monochromatic Outfits Using Different Textures

    How to Style Monochromatic Outfits Using Different Textures

    An all-black outfit built from three cotton pieces looks like you ran out of options. Same color, same fabric, same flat result.

    The difference between “monochrome that works” and “monochrome that looks like pajamas” comes down to one variable: the surface of each piece. Swap one fabric for a different one, and the whole outfit changes character.

    Most style advice tells you to mix tones. A lighter grey here, a darker grey there. I think that advice leads people straight into looking like mismatched laundry, and I’d rather see someone commit to one exact shade across three different textures than chase a tonal gradient that rarely lands right.

    This piece is for city dwellers who already own 15 black or grey items and need those pieces to stop reading like a uniform.

    Why Monochrome Goes Wrong Without Texture

    A single-color outfit collapses visually when every piece shares the same material. Three items in navy cotton jersey merge into one shapeless block. The eye has nothing to grab onto, nothing to separate the jacket from the shirt from the pants.

    Texture breaks that merge. A suede jacket over a cotton tee tucked into denim jeans, all in navy, reads as three distinct layers. 

    The matte pull of suede, the soft drape of cotton, the rigid weave of denim: each surface catches light differently. That difference is what creates depth.

    Image 1

    How Fabric Surface Creates Depth in Single-Color Looks

    Light behaves differently on every material. Silk reflects it. Wool absorbs it. Denim scatters it along its weave. A monochrome outfit that mixes these surfaces gives the eye a reason to travel across the body instead of glazing over it.

    This is also why all-black outfits photograph so differently depending on the fabrics involved. A matte wool coat over a satin turtleneck paired with leather boots creates three separate planes of black, each at a different brightness level. The color stays the same. The visual effect changes completely.

    And there’s a practical angle, too. Materials like wool and fleece add warmth for cool rooftop evenings, while linen and silk stay breathable on a July subway platform. Texture choices pull double duty: they shape both the look and the comfort of an outfit.

    Textures That Work for Urban Wardrobes

    Not every fabric belongs in every city. A chunky cable-knit scarf that looks right on a street in Warsaw would be miserable in Singapore. One mistake I see repeated on every fashion blog is treating texture recommendations as universal. 

    Climate dictates texture more than aesthetics do, and picking fabrics for looks rather than weather is the fastest route to a closet full of things you never wear.

    That said, some textures hold up across most urban settings because they perform well in a range of temperatures and wear patterns.

    Fabrics Worth Keeping in a City Closet

    A working city wardrobe can rely on a smaller set of textures than most people assume. The ones that earn their space do so because they layer well, breathe reasonably, and age without falling apart after two subway commutes.

    • Denim holds structure and works year-round in jeans, jackets, and shirts. It also fades in ways that add visual interest over time.
    • Leather shifts the tone of any outfit instantly. A leather belt, boots, or jacket adds a different sheen that pulls away from softer fabrics around it.
    • Cotton and linen are the breathable base layers. Matte finish, low shine, easy to layer under heavier textures without overheating.
    • Knitwear brings tactile contrast: chunky sweaters, ribbed socks, and knit beanies feel different from woven fabrics and catch light on their ridges.
    • Silk and satin introduce reflective shine in small doses. A silk scarf or satin lining inside a jacket adds an unexpected surface without overwhelming the outfit.
    • Suede and velvet work best in cooler months. Boots, hats, or bags in these materials carry a soft density that heavier fabrics like wool can’t replicate.

    How to Build a Monochrome Outfit Step by Step

    Outfit planning matters more when every piece shares one color. A mismatch in tone or a texture clash can turn the whole thing sloppy fast. The process that works best is simple, and it starts with picking the color before touching a single garment.

    • Pick a base color like charcoal, olive, or camel. Consider what suits your city: darker shades for concrete-heavy places like New York, earth tones for warmer-toned cities like Lisbon.
    • Choose three clothing items in that color, each from a different fabric. A wool sweater, cotton chinos, and suede boots in olive, for example.
    • Add one texture-contrasting layer: a quilted vest over a cotton shirt, or a glossy raincoat picked up at a vintage market.
    • Finish with subtle accessories in the same color family: ribbed socks, a corduroy cap, a woven belt.
    • Check the final combination in natural daylight before leaving. Indoor lighting flattens texture contrast, and what looks like three distinct surfaces under a lamp can merge into one block outside.

    Apps like Smart Closet help track which fabrics and colors are already in rotation. Logging successful combinations saves time on mornings when decision fatigue hits hard.

    Matching Textures to Your City’s Climate

    The raw material of your city’s weather should shape your texture palette. A velvet blazer that earns compliments in Montreal becomes a sweat trap in Miami. 

    Climate-appropriate texture mixing is the difference between outfits that get worn 40 times and ones that sit in a closet after two attempts.

    Climate Type Cities Best Textures Avoid
    Rainy and cool London, Amsterdam, Seattle Waxed cotton, water-resistant synthetics, rubber-grip accessories Suede, untreated leather, open-weave knits
    Hot and humid Singapore, Miami, Madrid Linen, Tencel, lightweight denim, mesh sneakers Velvet, heavy wool, layered knitwear
    Cold and dry Warsaw, Zurich, Montreal Tweed, felted wool, cable-knit scarves, ribbed wool hats Thin linen, unlined silk, single-layer cotton

    The takeaway: if a texture can’t survive your commute in comfort, it doesn’t belong in your monochrome rotation no matter how good it looks on a hanger.

    Mistakes That Flatten Monochrome Looks

    Getting monochrome right is mostly about avoiding a few specific errors that undo all the texture work. These come up constantly, and they’re worth naming directly.

    Too Much Uniformity in Shade

    Wearing every item in the exact same shade, with zero variation, can look unfinished rather than intentional. 

    A small shift in tone, like mixing charcoal with a slightly lighter grey, often reads more relaxed. I’d keep the tonal range tight though. Two closely related shades are enough. 

    Three or four shades of grey starts to look accidental, which is why I push back on the “tonal variation” advice that most style guides repeat without questioning. 

    Sticking to one shade and rotating textures produces a cleaner result than chasing a gradient that rarely aligns in real life.

    Ignoring Accessories

    Bags, belts, and shoes are where texture contrast lands hardest. A matte canvas tote against a silk shirt, or patent leather boots under cuffed denim: these small friction points between surfaces are what separate a considered outfit from a rushed one.

    Seasonal Mismatch

    Velvet in peak summer fails outside of air-conditioned spaces. Linen in January works indoors but collapses the moment wind hits. Match textures to the month, not the mood board.

    Real Monochrome Outfits by City and Season

    Abstract advice only lands when the reader can picture the finished product. A few combinations pulled from the raw material show how texture mixing works across different weather and cities.

    • Parisian winter, all black. A matte wool coat layered over a silky black turtleneck, cuffed black denim, patent leather Chelsea boots. Four textures, zero color deviation. The silk turtleneck catches light where the wool absorbs it.
    • Tokyo spring, creams and off-whites. A loose linen button-up, fine-gauge knitwear pullover, canvas trousers, textured canvas tote. Lightweight layers in breathable fabrics. The knit pullover separates visually from the linen and canvas pieces around it.
    • New York autumn, city grey. A heathered cashmere sweater, structured grey blazer, classic stonewashed jeans. The cashmere softness against the blazer’s sharper shoulder line creates contrast without any color shift at all.

    Sometimes a rule break works, too. A stark white sneaker under an olive outfit, or a tan leather belt splitting an all-navy look: these single interruptions re-energize the palette. Urban style runs on confidence more than strict compliance.

    Hunting for texture-rich secondhand pieces works well through platforms like Depop, where searching by fabric name (suede, corduroy, linen) filters faster than browsing by category. Touching fabric in person still matters when thrifting in physical stores. Labels and seams tell the truth about quality faster than photos.

    Questions People Ask About Monochromatic Outfits and Texture

    A few of the most common questions around monochrome styling come up repeatedly, and the answers are shorter than most people expect.

    • Q: How many textures should one monochrome outfit include?
      Three is the sweet spot. Two textures can still feel flat, and four or more can start competing for attention. A base fabric, one contrasting layer, and one accessory texture covers most situations without overcomplicating the outfit.
    • Q: Does monochrome dressing save money?
      It can, because pieces in the same color family mix more freely than a wardrobe built on pattern and color diversity. A new suede jacket in black works with every other black item already in the closet. That interchangeability stretches a smaller number of garments further.
    • Q: Should I match my bag and shoes in monochrome outfits?
      Matching material matters more than matching shade. A suede bag and suede boots in slightly different tones still read as coordinated. A leather bag and canvas shoes in the same exact grey can look disjointed because the surfaces are fighting each other.

    Conclusion

    Monochrome dressing in a city becomes easier once texture replaces color as the main variable. The closet shrinks, the combinations multiply, and mornings get faster. 

    A single shade worn across three surfaces says more than five colors thrown together in a rush. Committing to one color and rotating fabrics is the kind of constraint that makes getting dressed feel like a creative act again.

  • How to Remove Dye Transfer From Jeans Off Your Light-Colored Shoes

    How to Remove Dye Transfer From Jeans Off Your Light-Colored Shoes

    Blue streaks on a pair of white sneakers show up fast. One afternoon in raw denim, one humid commute, and the sides of those clean kicks look like they lost a fight with a Smurf.

    The stain itself isn’t complicated. But the advice floating around online treats every shoe material the same way, which is how people ruin good leather trying to save it from a dye mark.

    This guide is for the person who wears light-colored shoes in a city, commutes in jeans, and needs a method that matches the shoe they own. Not a generic cleaning list. A material-specific plan that accounts for how denim dye bonds to different surfaces.

    Why Raw Denim Bleeds Onto Shoes More Than Washed Denim

    Denim dye transfer comes down to one thing: how much unfixed indigo sits on the fabric surface. And the amount varies wildly depending on the jeans.

    Raw Denim vs. Pre-Washed Jeans

    Raw denim (also called dry denim) has never been washed after dyeing. The indigo sits loosely on the cotton fibers, waiting for friction, moisture, or heat to pull it off. 

    A pair of Naked & Famous or APC raw jeans will bleed significantly more dye than a pair of pre-washed Levi’s 501s. That difference matters when choosing what to wear with white shoes.

    Pre-washed and distressed denim has already lost most of its excess dye during manufacturing. The transfer risk drops substantially after about five to six home washes. 

    So a brand-new pair of dark jeans from Zara or H&M, which often skip heavy wash cycles to keep costs low, can bleed almost as much as raw denim during the first few wears.

    Humidity and Sweat Make It Worse

    Moisture accelerates dye transfer. Rainy commutes, humid summer days, and sweaty ankles all push indigo off denim faster. 

    The stain bonds harder too, because wet dye penetrates fibers and pores instead of sitting on the surface where a quick wipe could catch it.

    This is why the same jeans that seem fine on a dry winter day suddenly leave marks all over canvas sneakers during a July walk. The denim hasn’t changed. The moisture level has.

    The First 10 Minutes After a Dye Stain Matter Most

    A fresh dye transfer sits on top of the shoe material for a short window. Once it dries and sets, the indigo bonds with the fibers or fills the pores of leather, and removal gets significantly harder.

    Blot, Don’t Rub

    Grab a dry white cloth. Press it against the stain and lift. Repeat. Rubbing pushes the dye deeper into the material and spreads the stain outward. 

    A white cloth also lets you see how much pigment you are pulling up, so you know when to stop or switch methods.

    I’d recommend keeping a small pack of white microfiber cloths in a bag or desk drawer if light shoes are part of your regular rotation. A baby wipe works in a pinch, but the moisture can sometimes set the stain on certain leathers rather than lift it.

    Cleaning Methods That Match the Shoe Material

    The cleaning method depends entirely on what the shoe is made of. A baking soda paste that works on canvas can destroy suede. 

    A vinegar solution safe for smooth leather can leave water spots on nubuck. Matching the method to the material is the step most cleaning guides gloss over.

    Canvas and Fabric Shoes

    Canvas is the most forgiving material for dye removal. Mix a small amount of mild dish soap with cool water, dip a soft cloth, and dab the stain. Rinse the cloth, wipe the area clean, and let the shoe air dry away from direct sunlight.

    For stubborn marks that survive soap and water, a baking soda paste (two parts baking soda, one part water) can pull deeper stains out of canvas weave. 

    Apply it, let it sit for 10 minutes, then brush it off gently with a soft-bristled brush. A couple of precautions worth noting:

    • Do not soak the entire shoe. Water lines form on canvas when it dries unevenly, and they are harder to remove than the original dye stain.
    • Test the paste on a hidden area first. Some colored canvas shoes lose their own dye when exposed to baking soda.
    • Air dry only. Heat from a dryer or radiator can shrink canvas and permanently set any remaining dye.

    Leather and Faux Leather Shoes

    The standard advice for leather shoes is a 50/50 white vinegar and water solution. I think that advice is risky for anything beyond a quick surface wipe, especially on finished leather like the kind on Common Projects or Stan Smiths. 

    Vinegar is acidic enough to strip the protective finish on leather over time, and repeated use dulls the surface. A dedicated leather cleaner in the $10 to $15 range, like the one from Jason Markk, is safer for repeated cleaning and won’t degrade the finish the way vinegar can.

    If vinegar is all that’s available, dilute it well, apply it sparingly with a damp cloth, and follow immediately with a leather conditioner to restore moisture. But for regular denim dye removal on leather sneakers, a purpose-built cleaner pays for itself after two or three uses.

    Suede and Nubuck

    Suede is the trickiest material for dye transfer because the open nap traps pigment below the surface. Liquid cleaners can leave water stains that look worse than the dye mark.

    The best first step is a soft rubber eraser (a clean pencil eraser or a dedicated suede eraser). Rub gently over the stain in one direction. This lifts surface-level dye without introducing moisture.

    For deeper marks, apply a small amount of white vinegar to the stain with a cotton swab, blot immediately, and let the shoe dry completely. Once dry, brush the nap back into shape with a suede brush. Three things to keep in mind:

    • Never use a wire brush on suede. It tears the nap permanently.
    • Suede brushes are cheap and available at most shoe repair shops. Cities like Madrid and Los Angeles have specialty stores that carry them for under $8.
    • Colored suede hides dye transfer better than light suede. This is worth considering before buying cream or white suede shoes to pair with denim.
    Method Best For Avoid On Cost
    Soap and water Canvas, rubber soles Suede, nubuck Free
    Leather cleaner Smooth leather, faux leather Suede, unfinished leather $10-$15
    Baking soda paste Canvas, fabric Leather, suede Under $2
    Suede eraser Suede, nubuck surface stains Smooth leather, canvas $5-$8

    The table above covers the four main approaches. If a stain survives all of these, a professional shoe cleaner is the next step, not a stronger chemical.

    Stopping Denim Dye Transfer Before It Starts

    Cleaning stains works. Preventing them is less tedious. A few habits reduce dye transfer to almost zero on most shoes.

    Pre-Treat Shoes and Jeans Separately

    Protective sprays like Crep Protect create a hydrophobic barrier on shoes that repels liquid and pigment. One application lasts through several wears before reapplying. 

    Spray before the first wear, let it dry for 24 hours, and reapply every two to three weeks if the shoes see daily use. On the denim side, soaking new jeans in cold water with a cup of white vinegar for 30 minutes before the first wear helps set the dye. 

    This reduces (but does not eliminate) bleeding. Some raw denim purists skip this step because they want the natural fade patterns, but anyone wearing white shoes with raw denim should do it.

    Cuff Height and Shoe Choice

    Higher cuffs reduce contact between the hem and the shoe. A rolled cuff that sits above the ankle eliminates the friction zone entirely on high-top sneakers. On low-tops, a single roll usually creates enough clearance.

    Shoe color also matters more than people admit. Off-white and cream shoes hide minor dye transfer far better than bright white ones. My take on this: the Instagram-ready all-white sneaker paired with dark raw denim is one of the worst practical combinations in men’s and women’s streetwear, even though it photographs well. 

    Bone, sail, or ecru colorways give the same clean look while hiding minor staining that would ruin a pure white shoe.

    When Professional Help Makes Sense

    Some stains sit too deep for home methods. Shoe repair shops in most mid-to-large cities offer cleaning services, and some dry cleaners handle shoes too. 

    The cost typically runs between $15 and $30 depending on the material and severity.

    Cobbler apps and on-demand shoe care services exist in cities like London and Paris, though availability varies. Check local listings before assuming an app covers your area.

    Questions People Ask About Removing Denim Dye From Shoes

    A few questions come up repeatedly about this topic, and the answers add context to the methods above.

    • Q: Can I machine wash sneakers to remove denim dye stains? Canvas sneakers can sometimes survive a gentle cycle in a mesh laundry bag. Remove the insoles and laces first. But machine washing rarely targets the stain specifically, and it can weaken glue bonds on cemented soles. Hand cleaning gives more control and less risk.
    • Q: Do dark socks prevent dye transfer to shoes? Dark socks can absorb some dye before it reaches the shoe, especially around the ankle and tongue area. They are not a complete barrier, though. Friction between the hem and the outer shoe upper happens regardless of sock color.
    • Q: Is denim dye transfer permanent on white leather? Not always, but the longer it sits, the harder it gets to remove fully. On unfinished or lightly finished leather, deep-set indigo stains can become permanent within 24 to 48 hours. Quick action and a proper leather cleaner give the best odds.

    Conclusion

    Denim dye on white shoes is annoying, but it is almost always fixable when caught early. The combination of material-matched cleaning and a protective spray covers most situations a city commuter runs into. 

    Skipping the vinegar shortcut on leather and investing in a real cleaner saves both the shoes and the finish underneath. 

    And if raw denim is a regular part of the rotation, cuffing higher and choosing off-white over pure white makes the whole problem smaller before it starts.